Pages

Thursday, January 31, 2013

OmgSuite theme for Ubuntu 12.10/12.04/Linux Mint 14/13 (GTK + Gnome Shell)


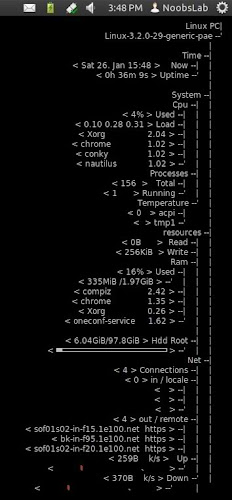
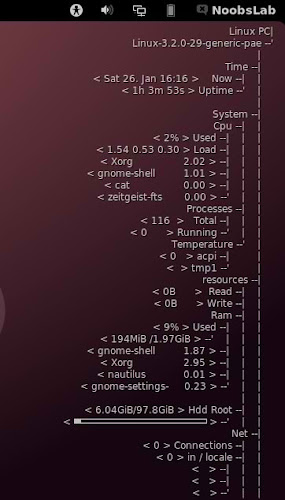
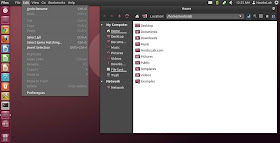
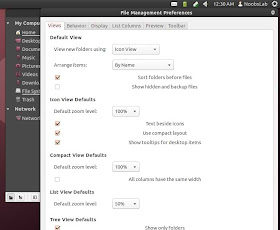
Omg-Suite based on myColors and Silent Night gtk2 theme. This theme is clean, elegant designed for those who like dark themes and three versions of GTK3 available (black, dark grey, and light grey), two versions of GTK2 available, author also made theme for Gnome Shell.

ubuntu themes

ubuntu gtk

ubuntu themes

omgsuite themes
Themes tested on Ubuntu 12.10/12.04 with GTK 3.6/3.4 and Gnome Shell 3.6/3.4

1st: OmgSuite theme for Chrome/Chromium (Click Here)
2nd: zonColor Wallpapers used in screenshots, Also checkout Black Wallpapers
3rd: zonColor-Icons used in screenshots, Also checkout icons collection
4th: You can use Gnome-tweak-tool or Ubuntu-Tweak to change icons and themes.

To install OmgSuite theme in Ubuntu/Linux Mint open Terminal (Press Ctrl+Alt+T) and copy the following commands in the Terminal:
  • sudo add-apt-repository ppa:noobslab/themes
  • sudo apt-get update
  • sudo apt-get install omg-suite
That's it

SparkyLinux 2.1 "Ultra"


Paweł Pijanowski has announced the release of SparkyLinux 2.1 "Ultra" edition, a Debian-based lightweight distribution with Openbox as the default desktop user interface: "SparkyLinux 2.1 'Ultra' edition has been released. The system is built on Debian 'Wheezy' and all packages have been synchronized with Debian's testing repositories as of 2013-01-23. It features a customized, ultra-light and fast Openbox desktop. What else? Fluxbox is out - I wasn't happy with it so I focus all my attention on Openbox; standard Openbox exit options changed to 'Shutdown', 'Reboot' and 'Log out'; added update-manager; the Polish repository mirror server replaced with the main Debian one; added a few new wallpapers; added to menu - run application, graphical two-panel file manager Tux Commander to have quick access to system files, added AppFinder...." Read the full release announcement for system requirements and a screenshot. Download: sparkylinux-2.1-eris-x86_64-ultra.iso (1,369MB, MD5).

Wednesday, January 30, 2013

Blizzard will release a game for Linux this year


Linux gaming world is growing continuously since Valve has released Steam for Linux. Now Blizzard is intending to give Linux community some love. So Phoronix.com has an information from a trustworthy source that Blizzard is going to publish a game title for Linux later this year, but it's unclear what exactly it will be.
While all the games of the company run great with CrossOver on Linux, a native Linux version of one of the games would be absolutely sensational. It is supposed that Blizzard already have a working in-house version of World Of Warcraft for Linux. However, World of Warcraft is not the only candidate for a Linux release. StarCraft 2: Heart of the Swarm is going to be released on the 12th March and is surely an ideal candidate for the company's first Linux title. Another highlight for the Linux community could be Diablo 3 which was released last year.
 
What do you think? Which title will come from Blizzard for Linux first?

Tuesday, January 29, 2013

Back Up Your Google Account to Your Mac with CloudPull


Do you use all or most of Google’s services on a regular basis? If so, I’m sure you’ll find a backup service like CloudPull extremely helpful. CloudPull is a Mac app that can back up your Google account to your Mac, which conveniently makes your information available for offline use and access. Additionally, it supports multiple accounts.
CloudPull supports: Gmail (and Google Apps email), Google Contacts, Google Calendar, Google Drive, and Google Reader. It will perform a backup every hour, and “maintain old point-in-time snapshots of your account for 90 days.
The cool thing about using CloudPull to back up your Google account is that the backups are created in standard file formats. This means that your items can be easily imported into Apple programs. For instance, your email messages can be imported into Apple Mail. Likewise, your contacts can be imported into Apple Contacts, calendar events can be imported into iCal, etc.
If you’re ready to get started, here’s how to back up your Google account with CloudPull Free.

Setup and Usage

1. Install CloudPull from the Mac App Store and open it.
2. On the welcome screen, you can choose to subscribe to CloudPull news alerts and/or be added to their mailing list.
Welcome to CloudPull, subscribe to news alerts.
3. On the next screen, you can choose to run CloudPull automatically when you log into your Mac, or you can run it manually when you choose to.
Choose to run CloudPull automatically or manually.
4. On the next screen, you’ll need to enter your Google account email address and password. You will also need to select the services that you want backed up.
Enter your Google account credentials and choose the services to back up.
Note: You will need to have IMAP enabled in your account in order to back up your email. Your Inbox, Sent Mail, Drafts and All Mail system labels will also need to have the “show in IMAP” option selected.
Make sure your system labels have the 'show in IMAP' option enabled.
5. Afer you click on “continue,” your username and password will be verified. You will then choose the labels from your Gmail or Google Apps email account that you want CloudPull to back up.
Choose the labels to backup in your Gmail or Google Apps account.
6. Finally, CloudPull will begin to pull in your data. If you have a large amount of data, this could take awhile. If you’re like me and have a really slow Internet connection at home, then of course it can take hours for your initial backup to finish.
CloudPull will pull in your data from Google and save it.
7. Your items can be accessed and organized via CloudPull’s email-like interface. Each item type will have its own set of options. All items can also be opened in their respective Apple applications (i.e. email in Apple Mail, contacts in Google Contacts, etc).
Your backed up items can be viewed offline and opened in their respective Apple programs.

Final Thoughts

CloudPull is an awesome way to back up your Google account and organize it in a user-friendly interface, but there are a few cons to the service. For starters, this is the free version. If you want to upgrade to the Premium version, it will cost you $10.
The free version of CloudPull only allows you to back up one Google account. So power users like me (with 4 different Google accounts), will not benefit much from the free version. The Premium version supports up to 10 different Google accounts.
The Premium version also has the option to run CloudPull as a background application; meaning it can run without appearing in the Dock or Force Quit window. Whatever you decide, you can’t deny that this is a handy app with a lot of benefits.
How do you backup your Google data?

Install Live Wallpaper in Ubuntu 12.10 Desktop


This simple and brief tutorial is going to show you a simple tool that replace your boring default wallpaper with a completely animated OpenGL wallpaper. Livewallpaper replaces your current wallpaper with an animated wallpaper. At the moment you can choose between the following live wallpapers:
  • Galaxy
  • Nexus
  • Noise
  • Photoslide
Install Live Wallpaper using PPA:
Hit Ctrl+Alt+T to open up a terminal, then run following 3 commands to install livewallpaper in Ubuntu 12.10 & 12.04:
sudo add-apt-repository ppa:fyrmir/livewallpaper-stable
sudo apt-get update
sudo apt-get install livewallpaper livewallpaper-config livewallpaper-indicator
After installation, launch livewallpaper from Unity Dash and you get the animated desktop. Launch livewallpaper-config or indicator to switch and configure wallpapers.


Porteus 2.0 RC2


The second release candidate for Porteus, Slackware-based live image set with a choice of KDE 4, LXDE, Razor-qt and Xfce desktop environments, is now ready for testing: "The Porteus community is pleased to announce Porteus 2.0 RC2, the latest development release of our Standard and Xfce editions. We've cleaned up several minor bugs that were present in RC1 and have added some new features. Please give this a thorough test so we can continue refining everything for 2.0 final. Here is our changelog from 2.0 RC1: Linux kernel upgraded to 3.7.5; fixed a bug with linuxrc not ejecting CDs in copy2ram mode; added a function to rc.M which disables discrete video card for PCs with dual graphics setup; rc.services - added a function for setting brightness when booting on battery...." Read the rest of the release announcement for a complete changelog. Download (MD5): Porteus-v2.0-rc2-x86_64.iso (224MB), Porteus-XFCE-v2.0-rc2-x86_64.iso (187MB).

Linux Deepin 12.12 Alpha


A preview version of Linux Deepin 12.12, a popular Chinese community distribution, has been unleashed for testing. This is the first version that ships with the brand new Deepin Desktop Environment (DDE), which replaces GNOME Shell as the default desktop. DDE along with its Deepin System Settings (DSS) is regarded as a milestone for the Deepin project. DSS is implemented with the Deepin UI library and it features automatic screen brightness adjustment, support for the Chinese lunar calendar, convenient network configuration, and so on. Also included in Deepin 12.12 Alpha is Deepin Software Center 3.0 Alpha, where the software applications are reorganized with better classification. Multimedia utilities for video and audio playback as well as screenshots have been upgraded to new versions for testing. Check the complete release announcement (in Chinese) for more information including known issues. Download: deepin_12.12_alpha_zh-hans_amd64.iso (702MB, MD5).

Monday, January 28, 2013

Install Linux Kernel 3.7.5 in Ubuntu/Linux Mint


Linux Kernel 3.7.5 is the fifth maintenance release of the kernel 3.7 series that has been made available for Linux users. This update brings more bug fixes and improvements. I have updated the bash script so that users can upgrade to this new kernel smoothly. You have to bear in mind that upgrading the kernel may render your system unstable, unusable or even may cause the loss of some device drivers (WiFi, videos drivers, etc.), so it is recommended that you backup your system before proceeding to the installation of this new kernel.

Here are some of the fixes taken from the kernel's changelog:


  •     ACPI: Add fixups for AMD P-state figures
  •     ACPI / processor: Get power info before updating the C-states    
  •     ALSA: hda - Fix mute led for another HP machine
  •     ACPI / cpuidle: Fix NULL pointer issues when cpuidle is disabled
  •     module: fix missing module_mutex unlock
  •     usb: gadget: FunctionFS: Fix missing braces in parse_opts
  •     usb: dwc3: gadget: fix ep->maxburst for ep0
  •     USB: UHCI: fix IRQ race during initialization
  •     arm64: elf: fix core dumping to match what glibc expects
  •     arm64: makefile: fix uname munging when setting ARCH on native machine
  •     vfio-pci: Fix buffer overfill
  •     ioat: Fix DMA memory sync direction correct flag

You can install the kernel in the following Ubuntu/Linux Mint distros (AT YOUR OWN RISK!):

  • Ubuntu 12.10/12.04/11.10 or older
  • Linux Mint 14/13/12 or older
Linux Kernel 3.7.5 Installation

As usual, you may download and install the kernel packages from here, or run simply this sequence of commands:

cd /tmp 
wget http://dl.dropbox.com/u/47950494/upubuntu.com/kernel-3.7.5 -O kernel-3.7.5 
chmod +x kernel-3.7.5 
sudo sh kernel-3.7.5 
sudo reboot

When having kernel upgrade troubles for users running the Nvidia driver, you can fix your system by enabling the text mode (CTRL+ALT+F2) and entering these commands:

    cd /usr/src/linux-headers-3.7.5-030705/arch/x86/include 
    sudo cp -v generated/asm/unistd* ./asm 
    sudo apt-get install --reinstall nvidia-current

Finally, to uninstall Kernel 3.7.5, you may use this command:

     sudo apt-get purge linux-image-3.7.5*

Enable or Disable Desktop Icons using a GNOME shell Extension


A GNOME shell extension provide capability to enable or disable desktop icons. Gnome tweak tool allows you to do the same function, but this extension brings a switch button in GNOME shell status menu for quicker and easier switching.
Desktop-Icon-Switcher-Gnome-Shell-Extension
Desktop icon switch GNOME shell extension can be installed using “gnome-tweak-tool” or you can installed by following the instructions down below.
Download the DesktopIconsSwitch-3.tar.gz package for the extension, and extract it and move it to GNOME shell directory using commands down below.
Run Terminal “Ctrl+Alt+t”, then type,
tar -zxvf DesktopIconsSwitch-3.tar.gz
mv DesktopIconsSwitch@bananenfisch.net/ ~/.local/share/gnome-shell/extensions/
Now open GNOME tweak tool, if you don’t have it, you can install it using this command,
GNOME tweak tool for Ubuntu and its derivatives
sudo apt-get install gnome-tweak-tool
GNOME tweak tool for Fedora and its derivatives
su
yum install gnome-tweak-tool
Finally, open GNOME tweak tool, select “shell extensions” and activate the Desktop Icon Switch extension.

Use IFTTT to Automate Your Internet Life


When using your computer or mobile device, it seems as if a multitude of applications are in use each day. Once you are done checking email and catching up on the news, you may have a ton of services to catch up with later during the day, from catching up with the latest on Instagram to documents received in Dropbox.
IFTTT_whatisIFTTT
Regardless whether you are finding a way to separate work from play, merging them together, or a little bit of both, we can all benefit with a little automation. We can have the Internet work for us. That’s the motto of IFTTT. Today, we will go over how it can help to with your daily syncing regimen.

What is IFTTT?

IFTTT’s purpose is to get the Internet to work for you. It will create a syncing regimen by piecing together your various social networking sites and online services and carrying out your tasks without you initiating them. From automatically having business email attachments saved into Dropbox to setting a text message alert each time precipitation is in the forecast for the next day, IFTTT makes it possible to have a free automated personal assistant.

Services Available to Help (Channels)

In IFTTT, a recipe is created in large part with the help of channels. These are the services and networks that drive IFTTT. The following are some of the popular services supported by IFTTT:
  • bitly
  • Blogger
  • Box
  • Buffer
  • Craigslist
  • Date & Time
  • Delicious
  • Dropbox
  • Email
  • Evernote
  • Facebook
  • Flickr
  • Foursquare
  • Gmail
  • Google Calendar
  • Google Drive
  • Google Talk
  • Instagram
  • LinkedIn
  • SkyDrive
  • SMS
  • Tumblr
  • Twitter
  • Weather
  • WordPress
  • YouTube
You can view all the channels here.

Creating a Task (Recipe)

1. On the IFTTT dashboard, click “Create” at the top region of the screen.
2. You will see the IFTTT phrase (If this then that), click “This”.
IFTTT_NewRecipe
3. With trigger channels presented, choose the channel (service/network) that you want to begin your recipe with. This is the channel that will cause an action to occur. For example, if you want to email a photo once it hits a Dropbox folder, Dropbox will be the trigger.
ifttt-choose-trigger-channel
4. In step 4, you will be presented with two or three additional options that allow for you to have a more specific recipe.
5. Options from here on out are custom to the type of recipe and service you are creating and choosing.
ifttt-choose-trigger
6. You will then choose the “That” or action channel. Back to our example in step 3, Gmail would be the action channel.
7. When finished with all prompts, click “Create Action“.

Useful Recipes

IFTTT_SampleRecipes

Syncing: For Work

  1. From Email Attachment to Dropbox: Got an email from the boss with the latest report? Have it saved in Dropbox without having to lift a finger.
  2. Receipts from Email to Evernote: Bookkeeping and tax records made easy with this recipe that automatically adds receipts from your email to Evernote.

Syncing: For Social

  1. Backup Your Photos: Each time you take a photo on Instagram, it is automatically saved to Dropbox. Works with Facebook and Flickr as well!
  2. Convert WordPress Posts into Ever-”notes”: From WordPress to Evernote, this recipe does just that.
  3. Keep Social Profile Pictures in Sync: Whenever your Facebook profile photo changes, your Twitter one changes as well.

Syncing: For Life

  1. Weather Alerts Each Morning: Not everyone has a smartphone. When waiting for the local news to tell you the weather holds you back in the morning, this recipe can help out.
  2. Send Family Photos To Grandma’s Email: From Dropbox folder to recipient’s inbox, automatically. You select the folder and recipient’s email.
As you have just learned, IFTTT can provide a wonderful way for you to keep your digital life in sync without even having to leave your web browser. In what ways do you think IFTTT can help your syncing regimen? Let us know in the comments below.

BleachBit 0.9.5 cleaner for Ubuntu 12.10/12.04/Any Ubuntu and Linux Mint Version


BleachBit is a free and open source utility which will help you get rid of those files which clutter up your hard drive and threaten your privacy. It also includes advanced features to shred files and clean disk space to prevent file recovery.

BleachBit, the open source system cleaner, announces the public 0.9.5 which includes enhancements, bug fixes, and translation updates.

Changelog:
  • Google Chrome, Chromium: separate cleaning of passwords out of history into its own option
  • Google Chrome: delete Flash cookies in Pepper Flash
  • Google Chrome: delete more history
  • Thunderbird: delete folder index files (.msf) thanks to BlackDex
  • Clean out obsolete data (hashpath) in bleachbit.ini to reduce file size and improve privacy.
  • Specific to Linux
    • Improve compatibility of memory wiping with 64-bit systems
    • Improve ability to run headless
    • Support newer Linux kernels in memory cleaner by using new out-of-memory score adjustment /proc/pid/oom_score_adj
Translation Updates:
  • Update Chinese (Traditional) thanks to Pin-hsien Li.
  • Update Croatian thanks to freedomrun.
  • Update Dutch thanks to rob.
  • Update English (Australia) thanks to Benjamin Donald-Wilson.
  • Update Esperanto thanks to Anthony, Ivan Camilo Quintero Santacruz.
  • Update French thanks to Nicolas Delvaux, Célestin Taramarcaz, nodiscc, gisele perreault.
  • Update Galician thanks to Miguel Anxo Bouzada.
  • Update German thanks to DNS, Daniel Winzen.
  • Update Hebrew thanks to Yaron.
  • Update Indonesian thanks to Abdul Munif Hanafi.
  • Update Italian thanks to Carml.
  • Update Malay thanks to abuyop.
  • Update Polish thanks to Isamu715 and PaweÅ‚ Szerszon.
  • Update Spanish thanks to Adolfo Jayme Barrientos.
  • Update Uyghur thanks to Gheyret T.Kenji.

Download deb file and install Bleachbit:
Ubuntu 12.10 (Quantal Quetzal) or Linux Mint 14
Ubuntu 12.04 (Precise Pangolin) or Linux Mint 13
Ubuntu 11.10 (Oneiric Ocelot) or Linux Mint 12
Ubuntu 11.04 (Natty Narwhal) or Linux Mint 11
Ubuntu 10.10 (Maverick Meerkat) or Linux Mint 10
Ubuntu 10.04 LTS (Lucid Lynx) or Linux Mint 9
Ubuntu 9.10 (Karmic Koala) or Linux Mint 8
Ubuntu 9.04 (Jaunty Jackalope) or Linux Mint 7

For other distributions see this page.

Sunday, January 27, 2013

Counter-Stike and X3: Reunion Support Linux


The wave of new games coming to Linux doesn't stop after the release of Steam Beta for Linux. Recently Counter-Stike and X3: Reunion were activated for Linux and can be played on Linux now, even if they are not labeled as such on Steam.

But not only older titles are released for Linux. One of the most successful strategy games of the last time, Crusader Kings II, was published for Linux recently.

And what's coming next?

Install Basic-conky in Ubuntu/Linux Mint/Debian/Fedora/Other


Conky is free widget for Linux, It can display any information whatever you want to show on your desktop. This conky gadget has no name, So NoobsLab just gave name Basic-conky. Basic-Conky was available for some environments but NoobsLab provides after modification for all Linux desktops like (Gnome Shell, Unity, Cinnamon, Gnome Classic, Mate, and others). Basic-conky shows CPU usage, Memory usage, HDD usage, Net Up/Down Speed and Network details, CPU up-time  Linux kernel and version, Day, Date, Time. You can check other conky widgets collection for Linux desktop to make desktop nice.

basic conky

Install Conky in Ubuntu/Linux Mint open terminal (Press Ctrl+Alt+T) and copy the following commands in the Terminal:
  • sudo apt-get install conky conky-all
Install by yourself in other distro's.

First of all Download Startup script with following commands:
  • wget -O .start-conky http://goo.gl/6RrEw
  • chmod +x .start-conky
Now open Startup Applications > click Add  > New Dialog box will open click on Browse > Now (Press Ctrl+H) see following screenshot.
conky startup

1: Basic-Conky for Ethernet
basic conky

>> For Unity, Gnome Classic, Mate, and Others
To install Basic-Conky in Ubuntu/Mint open Terminal (Press Ctrl+Alt+T) and copy the following commands in the Terminal:
  • wget -O basic-conky-eth-u.zip http://goo.gl/n0Jlg
  • unzip basic-conky-eth-u.zip
  • sudo rm basic-conky-eth-u.zip
>> For Gnome Shell, Cinnamon
To install Basic-Conky in Ubuntu/Mint open Terminal (Press Ctrl+Alt+T) and copy the following commands in the Terminal:
  • wget -O basic-conky-eth-gs.zip http://goo.gl/hOKZk
  • unzip basic-conky-eth-gs.zip
  • sudo rm basic-conky-eth-gs.zip

2: Basic-Conky for WiFi
basic conky

>> For Unity, Gnome Classic, Mate, and Others
To install Basic-Conky in Ubuntu/Mint open Terminal (Press Ctrl+Alt+T) and copy the following commands in the Terminal:
  • wget -O basic-conky-wlan-u.zip http://goo.gl/elD4z
  • unzip basic-conky-wlan-u.zip
  • sudo rm basic-conky-wlan-u.zip
>> For Gnome Shell, Cinnamon
To install Basic-Conky in Ubuntu/Mint open Terminal (Press Ctrl+Alt+T) and copy the following commands in the Terminal:
  • wget -O basic-conky-wlan-gs.zip http://goo.gl/2py72
  • unzip basic-conky-wlan-gs.zip
  • sudo rm basic-conky-wlan-gs.zip
That's it.

Vendetta Online Kickstarter


Guild Software, a long-time Linux supporter, let us know they’ve launched a Kickstarter project for their space combat MMO Vendetta Online to further extend the game’s scope:
Help fund the creation of “Vendetta Online 1.9″ by late 2013, with drastically expanded and polished gameplay. This will include improved graphics, sound and rendering technology, advancements to our universe, economy and conquerable territory, plus improvements to player-owned capships and other areas (detailed further below). Your support will make this timeline possible!

Valve Promoting Linux


Quick note that Valve hasn’t just introduced Steam for Linux; they’re actually promoting it very prominently, even to the point of linking Ubuntu itself on the Steam about page.

Saturday, January 26, 2013

Half-Life for Linux is available


Valve has released next title of the company, after Team Fortress 2, on Steam for Linux - Half-Life. The first part of the series appeared in 1998, it won over 50 Game of the Year awards and is undoubtedly one of the most successful video games of all time.
The game can be purchased on Steam Beta for Linux.

Mageia 3 Beta 2


Anne Nicolas has announced the availability of the second beta release of Mageia 3: "We are reaching the final run for Mageia 3 release - the beta 2 ISO images are available for tests. We will need your feedback on the Broadcom wireless chipset. We intentionally removed all proprietary drivers for it. So it comes configured using only the free one. This is a test to check support by the free drivers. If in some way we get too many failures, we will revert it to the hardware that still needs the proprietary driver. This release also comes with the brand-new vesion of LibreOffice, the 4.0.0 RC2 version." Read the brief release announcement and the more detailed release notes for more information and a list of known issues. Download links: Mageia-3-beta2-LiveDVD-KDE4-x86_64-DVD.iso (1,428MB, MD5, torrent), Mageia-3-beta2-LiveDVD-GNOME-x86_64-DVD.iso (1,389MB, MD5, torrent), Mageia-3-beta2-x86_64-DVD.iso (4,039MB, MD5, torrent).

Thursday, January 24, 2013

Install Nemo File Manager in Ubuntu 12.10/12.04/13.04


Nemo is a complete fork of Nautilus and its goal is to extend the Cinnamon user experience to desktop and file management. Nemo has features like: compact view, all desktop icons, etc.. which are missing in Nautilus 3.6 version, Open in terminal and open as root, File operation progress while copy/move files shows percentage and details, Has nice GTK bookmarks management, up/forward/back and refresh buttons, Nice proper status bar, better search, better widgets and many more.

nemo file manager
What Nemo offers:
  • Built in "Open as root" context menu item
  • Detachable tabs
  • Unified, configurable toolbar: you can add/remove the following: up icon, refresh icon, toggle button for the location bar / path bar, home icon, computer icon and search icon.
  • Option to show the full path in the titlebar and tab bars (Preferences > Display)
  • Displays an "elevated privileges" banner when running as root
  • Built in "Open in terminal" context menu item
  • Added "Set as Wallpaper" to the context menu
  • Added GTK bookmarks to the MoveTo/CopyTo context menus
  • Switch view buttons on the toolbar (Grid, List and Compact views)
  • Collapsable sidebar categories
  • Drag and drop support for the bookmarks in the sidebar
  • Sidebar: indicators under each drive, displaying the free/used space
  • Support for sending files via Thunderbird and xdg-email
  • Image properties improvements (merged from Nautilus 3.6)
  • Memory leaks fixes (merged from Nautilus 3.6)
  • and More!
nemo file manager

nemo file manager

nemo file manager

nemo file manager

To install stable Nemo File Manager in Ubuntu 12.10/12.04/13.04 open Terminal (Press Ctrl+Alt+T) and copy the following commands in the Terminal:
  • sudo add-apt-repository ppa:gwendal-lebihan-dev/cinnamon-stable
  • sudo apt-get update
  • sudo apt-get install nemo
To install Nightly Builds of Nemo File Manager in Ubuntu 12.10/12.04/13.04 open Terminal (Press Ctrl+Alt+T) and copy the following commands in the Terminal:
  • sudo add-apt-repository ppa:gwendal-lebihan-dev/cinnamon-nightly
  • sudo apt-get update
  • sudo apt-get install nemo
Install Extra plugins for Nemo File Manager, First add PPA from above then install:
  • sudo apt-get install nemo-compare nemo-dropbox nemo-fileroller nemo-pastebin nemo-seahorse nemo-share
That's it

Install Ubuntu Phone Clock in 0.5 Ubuntu 12.10/12.04/Linux Mint 14/13


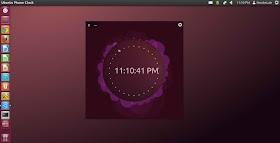
Ubuntu OS is getting popular day by day and almost all Linux users(Power-User) is waiting for Ubuntu OS to run on their phones. Ubuntu Phone OS has really nice clock on screen which changes color and animation on phone OS. So now Gabriel Barbosa Nascimento made this clock for Ubuntu desktop OS. It looks really fancy & cool and it has classic feature to animate clock and change color after sometime automatically. Also there are clock colors available to choose which is relevant to your wallpaper/theme. It is possible to drag this widget anywhere on your desktop. This has been tested in Ubuntu 12.10/12.04, If you want to try on other Ubuntu or Ubuntu based versions then Go ahead.

ubuntu phone clock

ubuntu os clock

ubuntu clock

To install in Ubuntu 12.10/Linux Mint 14 open Terminal (Press Ctrl+Alt+T) and copy the following commands in the Terminal:
  • sudo add-apt-repository ppa:barbosanascimentogabriel/ubuntu-phone-clock
  • sudo apt-get update
  • sudo apt-get install ubuntu-phone-clock
To install in Ubuntu 12.04/Linux Mint 13/Other Ubuntu versions open Terminal (Press Ctrl+Alt+T) and copy the following commands in the Terminal:
  • wget -O ubuntu-phone-clock.deb http://goo.gl/6b5Cs
  • sudo dpkg -i ubuntu-phone-clock.deb && rm ubuntu-phone-clock.deb
That's it

Descent|OS 3.0.2


Brian Manderville has announced the release of Descent|OS, a desktop Linux distribution combining the Ubuntu base system with the latest version of the MATE desktop environment: "I am pleased to announce that the 'Legacy' branch of Descent|OS has been updated to version 3.0.2. Since the main focus of the Ubuntu-based edition is stability, the main upgrades were big fixes. I have fixed the driver install issue, and also fixed the audio applet issue. Here is a list of the full changelog: PulseAudio is officially default, Mate-media-pulse is much more well-implemented than its GStreamer sibling, so I have implemented it to maintain consistency and make it easier for people to change their audio settings; MATE is updated to 1.4, this is actually a huge milestone, because MATE 1.4 is a stable, well-implemented version, and works better with everything in Descent|OS; Lubuntu Software Center is included...." Here is the brief release announcement. Download: DescentOS-3.0.2-i386.iso (1,081MB).

Netrunner 12.12.1


Clemens Toennies has released an updated build of Netrunner, a Kubuntu-based distribution with KDE 4.9.4: "Netrunner 'Dryland' 12.12.1 has been released. KDE updated to 4.9.4 from Kubuntu backports; Firefox updated to 18; VLC updated to 2.0.5; Tomahawk new version 0.6; WINE updated to 1.5.22; Samba Mounter updated to 0.3.1; Webaccounts updated 0.3; Veromixer installed; Runners-ID upgraded from 1 to 5 GB free cloud space; many more fixed issues and improvements. The version is based on Kubuntu 12.10 and has the following features: GNU/Linux OS kernel 3.5; Firefox 18 with KDE integration; Thunderbird 17.0.1; LibreOffice 3.6.2; Skype 4.1; GIMP 2.8; Krita, Gwenview, Kdenlive, Telepathy Messenger, Samba Mounter (easy NAS setup), Webaccounts (social accounts integration), Runners-ID (free and libre cloud storage and music streaming), Muon Discover, VirtualBox." Here is the brief release announcement. Download (MD5): netrunner-12.12.1-amd64.iso (1,530MB, torrent).

Wednesday, January 23, 2013

How to Generate A New Sources List For Ubuntu


If you have ever peeked into the “sources.list” file located at the “/etc/apt/” folder, you will know that it contains the repository of all the packages available to your machine. Additionally, if you want to add PPA manually, you have to open this file and add the PPA to the end of the list. What if, on a fresh install of Ubuntu, you discover that your “sources.list” is empty? Or you need to change the whole repository to one that is specific to your country? How can you generate a new sources list without any technical skill?
The Ubuntu Sources List Generator is one great tool that you can use to generate source list for your Ubuntu.
1. Go to the Ubuntu Sources List Generator site.
2. Select the Country where you want to download the repository from.
3. Select your Ubuntu release.
source-generator-select-country-release
4. Scroll down the list and select the components that you want in your repository. The standard ones are “Main”, “Restricted”, “Universe”, “Multiverse”, “Security” and “Updates”. You can also include “Partner” and “Extra” to include additional software that are not provided by Ubuntu.
5. In addition to the main sources, the Generator also include popular PPAs like Cairo Composite Manager, Cortina Wallpaper changer, GIMP, Google Chrome, Virtualbox, Steam, Spotify etc. that you can include in your sources list. Simply check the box beside the PPA.
source-generator-third-party-software
6. Lastly, scroll all the way down to the bottom and press the “Generate List” button.
7. On the next page, you should see three big boxes. The first box at the top contains the sources list that you have selected and you will need to copy/paste them into your sources.list file. In your terminal,
gksu gedit /etc/apt/sources.list
Paste the sources lists into the document (for a new slate, you might want to erase all the existing sources listed in the file before pasting the new sources list in). Save and exit.
8. If you have added third party software’s PPA, it will show you the PPA key that you need to add to your system. Run the commands in your terminal, line by line.
source-generator-generated-sources-list
9. The third box is the alternate layout for Synaptic, which you can ignore most of the time.
To complete the process, you need to update and upgrade your system:
sudo apt-get update && sudo apt-get upgrade
That’s it.

How to Preview Links Before Clicking in Google Chrome


Have you ever wished you could see what was behind a link before clicking on it?
When using Google Chrome to browse the Web or read a social networking site like Facebook or Google+, a feature that will let you preview links can really come in handy.
If you’re looking for an easy way to preview a link before clicking on it, look no further. There’s a neat extension for Chrome that allows you to do just that.
1. Install the SwitftPreview extension.
2. Head over to the options page by right clicking on the SwiftPreview browser icon and selecting “options.”
3. In options, you can customize the preview window’s width and height. If you prefer, you can even make the preview fit to your window.
SwiftPreview's options page.
4. By default, you can see a link preview by just hovering over the link – after a slight delay. In options you can change this behavior so that you have to hold down the shift key to see a preview instead.
5. Once you’re done setting up the options, you can browse to any Web page to test it out. When you hover your mouse over a link (short or long), you should see a preview after a few seconds (or long if you’ve changed it in the options).
Pin link previews to your window with SwiftPreview.
6. You can pin the preview to your window by clicking the CTRL key on your keyboard. This way it won’t disappear when you move your mouse away from the link.
7. You can also block link previews on individual domains by clicking on the browser icon from that domain. SwiftPreview will be immediately disabled on that domain; you can click the browser icon again to re-enable it for that domain.
That’s it’s! SwiftPreview is definitely not the only tool that can help you preview links in Google Chrome, but it’s simple and does the job well. You’ll save time and clicks.

Cinnarch 2013.01.23


Alex Filgueira has announced the release of Cinnarch 2013.01.23, the latest build of the project's desktop distribution that combines Arch Linux with Cinnamon (a fork of GNOME Shell). This is a beta release. From the announcement: "Another month, another release. This one with some great improvements. One of the downsides of installing Cinnarch is the time that the installer spends downloading the packages. Almost 500 MB in packages have to be downloaded one after the other. This new version reduces the downloading time doing parallel downloads thanks to a Pacman wrapper called powerpill. This new system downloads everything with a 12 MB connection in just 4 - 6 minutes. With this we avoid the 'select mirror' step, because there's no need, but at the end, in your final system, you will have selected by default the 5 fastest mirrors to your location in the case of the Arch Linux repositories." Download (MD5) the live CD image from here: cinnarch-2013.01.23-x86_64.iso (699MB).

BackBox Linux 3.01


Raffaele Forte has announced the release of BackBox Linux 3.01, an updated version of the project's Ubuntu-based distribution and live DVD with a collection of penetration testing, incident response, computer forensics and intelligence gathering tools: "The BackBox team is pleased to announce an updated release of BackBox Linux, version 3.01. This release includes features such as Linux kernel 3.2 and Xfce 4.8. The ISO images (for 32-bit and 64-bit architectures) can be downloaded from the download page. What's new? System improvements; upstream components; bug corrections; performance boost; improved auditing menu; improved Wi-Fi drivers (compat-wireless Aircrack patched); new and updated hacking tools (e.g. backfuzz, Beef, Bluediving, cvechecker, HTExploit, Metasploit, set, sqlmap, WebSploit, Weevely, WPScan, zaproxy, etc.)" Read the full release announcement for system requirements. Download (MD5): backbox-3.01-amd64.iso (1,381MB, torrent).