Sunday, August 12, 2012

Android PC vs Hackberry A10


After the Raspberry Pi, the APC and Hackberry A10 are the latest entrants in the hugely popular line of ultra small motherboards designed to run any thing from the Android OS to trimmed down Linux distributions. But keep in mind that these are development boards, not mobos that you can buy and build a standard desktop computer from.
No wonder they are popular with tinkerers, developers and wannabe DIYers. No doubt that they will eventually go mainstream, but for now, these boards are a hacker’s delight. This article presents a casual comparison of the Android Personal Computer (APC) and the Hackberry A10.


FeaturesAndroid PC (APC)
APC
Hackberry A10
A10
CompanyA product of VIA Technologies Inc., a manufacturer of integrated circuits based in Taipei, TaiwanA product of Miniand, a technology company based in Canberra, Australia.
ProcessorVIA 800MHz ProcessorAllwinner A10 ARM Cortex A8 clocking at 1.2GHz
This is obviously a more powerful system than the APC.
Graphics (GPU)Hardware 2D/3D Graphic.
Resolution up to 720p
Not as powerful a graphics processing power as the A10
Mali 400 (4 max GPU cores). Hardware 3D acceleration and video decoding.Resolution 1080p
Memory512 MB DDR3 512 MB to 1 GB DDR3
There are two different models, one with 512 MB of RAM and another with 1 GB.
ConnectivityHDMI
VGA
USB 2.0 (x4)
microSD Slot
HDMI
VGA
USB 2.0 (x2)
microSD Slot
4-pin serial port
Storage2 GB NAND Flash. 4 GB NAND Flash. SDHC card slot supporting up to 32 GB
Networking10/100 Ethernet10/100 Ethernet, Realtek 802.11n WiFi
Supported OScustom Android systemAndroid 4.0 ICS, Linux
Comments/
Resources
The price tag for the APC is USD $49, but because of overwhelming demand, the company has stopped taking pre-orders - for now.

Home page. Download the kernel and boot loader from
here.
The price tag for the 512 MB model of the A10 is USD $60, but is currently out of stock. The 1 GB model is due at the end of this month and the published price tag is USD $65.

Home page

Ashampoo.HDD.Control.2.10.Final


The hard drive is one of the most important components of your computer. Even if a hard drive works flawlessly, it should still be regularly checked and maintained. This way an imminent hard drive failure can be detected early and might be prevented. If suddenly major problems occur or if your hard drive even completely fails, data loss might be the result.

Make sure you are prepared for such a situation. Ashampoo HDD Control 2 can notify you early so that your valuable data won't become the victim of a hardware crash. Now Ashampoo HDD Control 2 offers even more functions to check the status of your hard drive(s). Use for example the S.M.A.R.T self-test or adjust the noise level and power management of your hard drive(s) (if supported). Furthermore you can restore accidentally deleted files and folders with Ashampoo HDD Control 2. Get to know the all-rounder for monitoring, maintenance and defragmentation, and check the health status and performance of your hard drive(s) today.

Software Highlights
Constant monitoring of your hard drive(s) (also for multi-user systems)
Extended user interface with extensive hints and information on health, performance and temperature of the hard drive(s)
Significantly extended support for external USB hard drives and solid state drives (SSDs)
Support of S.M.A.R.T self-test (if supported by the hard drive)
Adjustment of the noise level and power management of your hard drive(s) (if supported by the hard drive)
Data recovery recovering deleted files and folders
Fully automatic, proactive defragmentation of the hard drive(s)
Online retrieval of achieved benchmark results of your hard drive model(s)

Install Linux Kernel 3.5.1/3.4.8 On Ubuntu 12.04/Linux Mint 13


Two updates for Linux 3.4 kernel series and Linux 3.5 kernel series have been released recently bringing more support for hardware drivers and various corrections and improvements. You can find full changelog for Kernel 3.5.1 here, and here you can find full changelog for Linux kernel 3.4.8.

In this tutorial, we will see how to install these two kernel versions under Ubuntu 12.04/11.10 or older and Linux Mint 13 or older.

Kernel 3.5.1 Installation

Users of the Linux 3.5 kernel series can upgrade to the 3.5.1 version with these commands for both 32-bit-i386/64-bit-amd64 systems:

cd /tmp 

wget -O linux-kernel-3.5.1 http://dl.dropbox.com/u/47950494/upubuntu.com/linux-kernel-3.5.1

chmod +x linux-kernel-3.5.1

sudo sh linux-kernel-3.5.1

After installing the kernel, reboot your system, then check if it is well installed with this command:

uname -r

outputs returned:

3.5.1-030501-generic

To uninstall kernel 3.5.1 and revert to the previous kernel, run this command:

sudo apt-get purge linux-image-3.5.1-030501

Kernel 3.4.8 Installation

Users of the Linux 3.4 kernel series can upgrade to the 3.4.8 version with the following commands:

cd /tmp

wget -O linux-kernel-3.4.8 http://dl.dropbox.com/u/47950494/upubuntu.com/linux-kernel-3.4.8

chmod +x linux-kernel-3.4.8

sudo sh linux-kernel-3.4.8

Then reboot your system to finish the installation of the kernel. To uninstall kernel 3.4.8, run this command:

sudo apt-get purge linux-image-3.4.8-030408

Saturday, August 11, 2012

What type of Linux users are you?


I just found this funny picture about the descriptions for various types of Linux user on this blog:


Personally, Im having 2 laptops that run Linux Mint 13 and Fuduntu, 1 netbook that runs Arch and 1 desktop with SolusOS. But I think I look better than the #2 pic :D.

How about you? Which distro(s) you are using? And do you think the picture above describes you to the tee :D?

Install LibreOffice 3.6 (Final) From PPA In Ubuntu 12.10/12.04/11.10/Linux Mint 13


LibreOffice 3.6 is the latest version that has been released recently bringing more new features and improvements. This version comes with totally new redesigned splash screen in green, here is a screenshot of it:


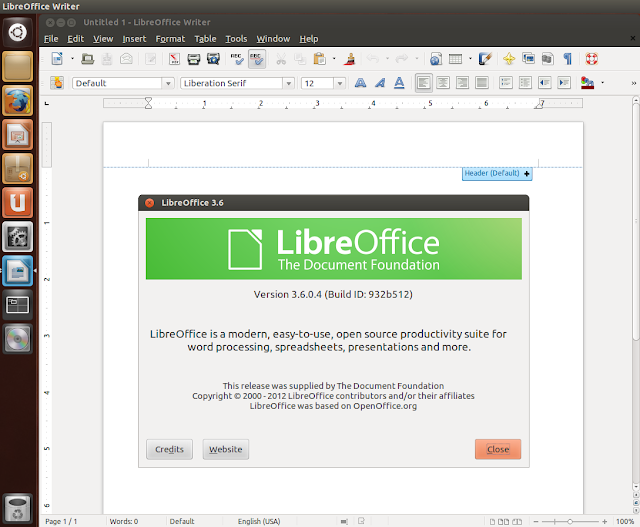
You can find here the release notes for LibreOffice 3.6. If you want to install LibreOffice 3.6 manually, you can refer to the download page here. As this latest version hasn't been added to the official PPA of LibreOffice, you can simply install it via our custom PPA as described below. The PPA is workable for Ubuntu 12.10/12.04/11.10 and Linux Mint 13 or older.


LibreOffice 3.6 Installation

Uninstall firstly the older version with these commands:

sudo apt-get purge libreoffice*

sudo apt-get autoremove

To install the 32-bit/i386 version of LibreOffice 3.6 under Ubuntu/Linux Mint, open the terminal and run the following commands:

sudo add-apt-repository ppa:upubuntu-com/libreoffice
sudo apt-get update
sudo apt-get install libreoffice

For the 64-bit/amd64 version of LibreOffice 3.6, run these commands:

sudo add-apt-repository ppa:upubuntu-com/libreoffice64
sudo apt-get update
sudo apt-get install libreoffice

Log out and log back in so that LibreOffice 3.6 icons show up in the dash, or simply restart Unity with this command:

unity --replace

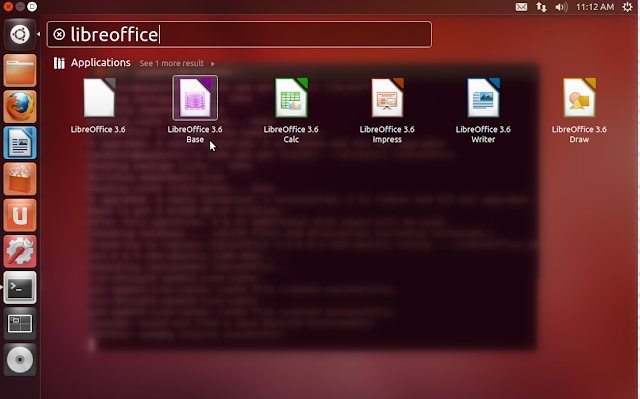
You can now search for LibreOffice 3.6 via the Unity Dash and drag and drop its related icons into your Unity Launcher:


If you find troubles installing from our PPA, you can simply uninstall with the following commands:


sudo apt-get install ppa-purge
sudo ppa-purge ppa:upubuntu-com/libreoffice
sudo apt-get update
sudo apt-get purge libreoffice*
For 64-bit systems, uninstall with these commands:
sudo apt-get install ppa-purge
sudo ppa-purge ppa:upubuntu-com/libreoffice64
sudo apt-get update
sudo apt-get purge libreoffice*

Friday, August 10, 2012

10 things to do after installing Fuduntu


As you have read my previous post, I just installed Fuduntu 2012 and really like it. Although Fuduntu is a great distro, there are still several things to take care of after the installing. Here is the list of 10 things I did for my new Fuduntu 2012 box:


1 - Update system

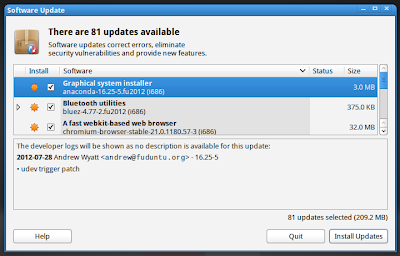
Im using the latest version of Fuduntu but it doesnt mean that I got all the upgrades to the softwares that were bundled. To update system in Fuduntu, you can go to the menubar on the Gnome panel, click on System > Administration > Software Update and the Update manager window will open. It will check for new updates for a while. After that, you can select to either install all the new updates or just some necessary ones.


2 - Get new themes and icons

The default theme and icon of Fuduntu dont look bad but they will become monotonous very soon in my opinion. To get new themes and icons, the best place is Gnome look. After downloading the compressed files , extract them to ~/.icons for icon themes and ~/.themes for gtk themes. ( Create these folders first if you dont have these .icons and .themes folders in your /home partition)

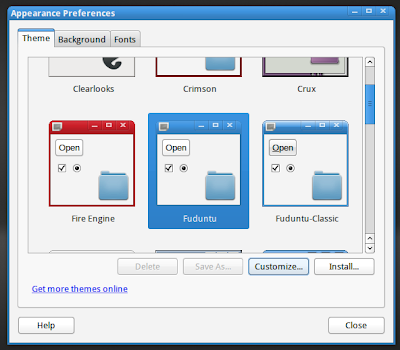
After that, to change themes and icons, right click on the desktop and select "Change Desktop Background" to open the Appearance Preferences window and select the new themes and icons for your Fuduntu desktop:


3 - Get a nice conky

Conky is one of the most amazing applications in the Linux world, an elegant conky setup will make your desktop look really better and it also helps you monitor your system with ease. Even some screenshots on the Funduntu homepage have conky on them.

A Fuduntu desktop screenshot with conky on the right

To get a nice conky config for your Fuduntu desktop, you can check my article about some beautiful conky configs on Gnome look.

4 - Add the shutdown button to the Gnome panel

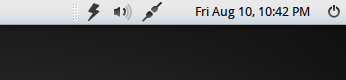
By default, there is no shutdown button on the desktop of Fuduntu. Therefore the simplest way to shutdown or reset or hibernate your computer is to go to the menu bar then click System > Shutdown, which is pretty redundant in my opinion. Adding the shutdown button to the Gnome panel will save a lot of time.


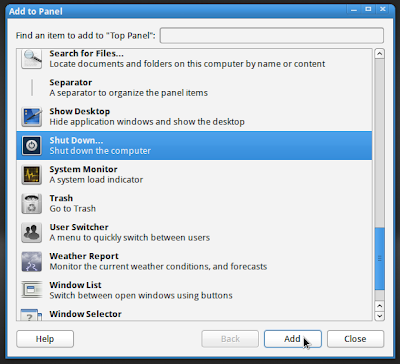
To add the shutdown button to the Gnome panel, just right click on the panel and select "Add to Panel" to open the applets list, then scroll down to find the Shutdown button applet and click the "Add" button.


5 - Allow user to use root privileges

By default, the local user is not allowed to use root privileges. It may annoy you if you are a former user of Ubuntu and just want to run the "sudo" command to install new packages.

To allow user to use root privileges, open the terminal and type the following command to become root:
su

Then run the following command to edit the sudoers list:
visudo

Then scan through the file to find the line:
root ALL=(ALL) ALL

Right below this line, add the following line:
your-user-name ALL=(ALL) ALL

To read more about this issue, you can check this page on the official wiki of Fuduntu.

6 - Install Gnome-utils

The default screenshot tool of Fuduntu is shutter. It's perhaps just my preference but shutter is too bloated and complicated for my taste. Im too accustomed to the good old gnome-screenshot. To use gnome-screenshot and some other familiar Gnome tools like the dictionary, disk usage analyzer .. in Fuduntu, the package you need to install is gnome-utils. You can either search for it in the Software Center or run the following command:
yum install gnome-utils
 
7 - Install a torrent client

I use torrent a lot so getting a torrent client is a must for my Fuduntu box. You can type "torrent" in the Software Center and it will give you various packages for you to choose. Of if you already know the name of the package you can open the terminal and install it with yum. For example, my favorite torrent client in Transmission and and used the following command to install it in Fuduntu:
yum install transmission-gtk

8 - Install LibreOffice

The only office package in Fuduntu is Google Docs, and since my internet is unstable, I prefer using something offline. My choice is LibreOffice. To install LibreOffice, the command will be:
yum install libreoffice

9 - Install GIMP

Just like for office work, Fuduntu doesnt offer much for graphic work with only Shotwell preinstalled by default. That's why GIMP was what I needed to add after the fresh installation. The command to install GIMP in Fuduntu is:
yum install gimp

10 - Add more applications to the AWN dock

By default, there are only 4 applications on the AWN dock ( actually 3 because the Gmail icon is to launch Chromium). For quicker launching, I added more applications to the dock.

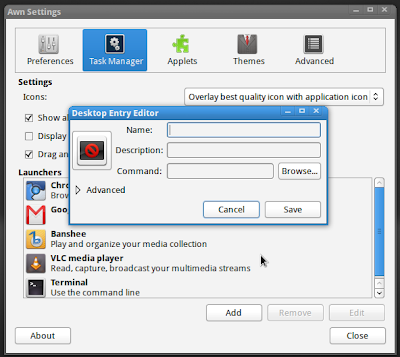
To add applications to the AWN dock, you can either go to the Task Manager in the AWN settings window then create new custom launchers:


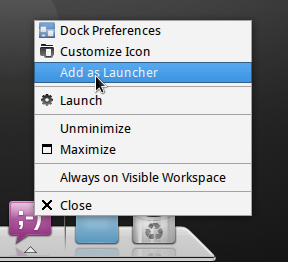
A faster and easier way to do the task is when you are running an app, right click on its icon on the dock and select the "Add as Launcher" option:


 Here is my AWN dock with some additional applications I just added:


*******************************
That's the first 10 things I did for my new Fuduntu box. Fuduntu is a pretty cool distro, I will keep exploring and messing around with it and if I find anything new to tweak, I will write about it soon.