Monday, September 24, 2012

How to Record Screencasts as Animated GIFs under Ubuntu 12.10/12.04/11.10/Linux Mint 13


A screencast is the recording of computer screen (aka screen capture) with the help of screen recording software. If you want to convert these screencasts into animated GIFs to use them on your blog or website, then this tutorial will explain this using two methods under Ubuntu/Linux Mint.

Method 1

The first method consists of using Byzanz which allows to record screencasts as GIFs. To install it under Ubuntu 12.10/12.04/11.10 or Linux Mint 13/12, open the terminal and run these commands:

sudo add-apt-repository -y ppa:fossfreedom/byzanz
sudo apt-get update
sudo apt-get install -y byzanz

You can now use this comman to record GIF screencasts (replace details with your own):

byzanz-record --duration=15 --x=400 --y=400 --width=800 --height=600 output.gif

For more help about the use of Byzanz, run this command:

byzanz-record --help


Note: The GIF file will be saved in the current terminal location.
Method 2

The second method is a little bit complicated because we will use a screen capturing tool to record a screencast, convert this video to images (JPG), then converting these images to an animated GIF. Let's firstly install needed packages with this command:

sudo apt-get install imagemagick gtk-recordmydesktop mplayer

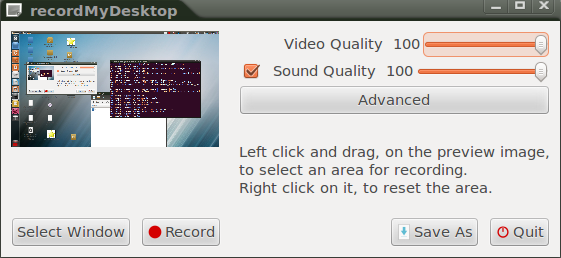
Start now the recordMyDesktop application and record a screencast, then save it in any folder of your choice (.ogv format).

Let's now save this video in JPG screenshots with this command:

mplayer -ao null video.ogv -vo jpeg:outdir=mypics

video.ogv -> Replace it with your own video file name.
mypics -> This is the name of the folder that will contain the extracted JPEG files. Rename it to whatever you want.

Using the terminal, cd to the folder containing JPEG screenshots and run this command:

convert * file.gif

If you have extracted the JPEG files in a folder containing various file formats, then run this command instead:

convert *.jpg file.gif

Rename file.gif with any name of your choice. The conversion may take time depending on the total size of JPEG files.

To optimize this GIF file, you can use this command:

convert file.gif -fuzz 15% -layers Optimize file-optimized.gif

Sunday, September 23, 2012

How To Disable Recovery Mode Under Ubuntu 12.10/12.04/Linux Mint 13


RecoveryMode is very useful for users who have boot issues because it will help them repair their systems using CLI mode with root privileges. The problem here is that unauthorized users who may have access into Recovery Mode would have root permissions on your system files without the need to enter the root password. If you are a bit concerned about this security issue, you can disable Recovery Mode using the instructions given below.


WARNING: Disable "Recovery Mode" at your own risk! Any incorrect modification may render your system unusable or unbootable.
The tutorial will help you disable Recovery Mode under Ubuntu 12.10/12.04/11.10, Linux Mint 13/12 or older. Here is how the Grub boot menu will look before and after modifications:


But firstly, let's backup the file we are going to edit with this command:

sudo cp /boot/grub/grub.cfg /boot/grub/grub.cfg.back

Edit now grub.cfg with this command:

sudo gedit /boot/grub/grub.cfg

For Linux Mint, edit it with this command:

sudo pluma /boot/grub/grub.cfg

In this file, press CTRL+F and search for "recovery" without quotes. The lines related to recovery mode should be commented all in order to disable RecoveryMode. They will be represented as follows:

menuentry 'Ubuntu, with Linux x.x.x- (...) (recovery mode)' (...) {
(...)
(...)
(...)
}

After being commented, they would look like this:

# menuentry 'Ubuntu, with Linux x.x.x- (...) (recovery mode)' (...) {
# (...)
# (...)
# (...)
# }

Here is a real example:

Click To Enlarge

After commenting all lines related to Recovery Mode, save your file and reboot your system. Hold down the SHIFT key to bring up the GRUB boot menu. If your modifications are correct, Recovery Mode line will not appear in the boot menu:


To enable Recovery Mode, run this command from the terminal:

sudo cp /boot/grub/grub.cfg.back /boot/grub/grub.cfg

Saturday, September 22, 2012

SMPlayer 0.8.1 Released, Installation Via PPA Available For Ubuntu 12.10/12.04/Linux Mint 13


SMPlayer is a media player (front-end for MPlayer) capable of playing almost any audio/video formats such as avi, mp4, mp3, mpeg, etc. The player has many interesting features like the ability to remember settings done to played media files. When closing, for example, a video and re-open it, it will be resumed from the point you ended your viewing of the video with the same settings set (volume, subtitles, etc.).


You can review all features for SMPlayer here. The latest version of SMPlayer is 0.8.1 which brings a fix for Youtube playback problems. To install SMPlayer 0.8.1 on Ubuntu 12.10/12.04/Linux Mint 13 or older, open the terminal and run the following commands:

sudo add-apt-repository ppa:rvm/smplayer
sudo apt-get update
sudo apt-get install smplayer smplayer-themes smtube

Red Hat Enterprise Linux 5.9 Beta


The legacy release Red Hat Enterprise Linux (RHEL), version 5, is getting one more "Production Phase 1" update on its 10-year life cycle road. A beta build of version 5.9 is now available for download and testing. From the release announcement: "Red Hat is pleased to announce the availability of the beta of the next minor release of Red Hat Enterprise Linux 5, Red Hat Enterprise Linux 5.9. Included in this minor release are a broad set of updates to the existing features. The beta release also provides new functionality in the areas of virtualization and networking, and new support for standards, certifications and security, as well as new features that support certificate-based Red Hat Subscription Management. Also included are additions to capabilities for developers and support for some of the latest platforms from our hardware partners. With new drivers for Microsoft Hyper-V that have recently been accepted by the upstream Linux community, customers can now run Red Hat Enterprise Linux 5.9 as a virtual guest on Hyper-V with improved performance." Existing RHEL customers can download this beta release from Red Hat's Software & Download Center.

Friday, September 21, 2012

Manjaro Linux 0.8.1


Roland Singer has announced the release of Manjaro Linux 0.8.1, an Arch-based Linux distribution featuring the latest Xfce desktop: "Exactly one month after we released our first beta of Manjaro Linux, here is our first point-release in our 0.8 series. Most people criticized that Manjaro wasted to much RAM. We replaced LightDM with LXDM, specially patched to have a better theme support. Of course we needed a nice Manjaro theme for LXDM. The only problem is that there are no LXDM themes available. So I sat down last night with a cup of coffee and started coding. To have a nice login interface I wanted to add a transparent black background to the login area. This required some patching in the LXDM greeter. I am really happy with the result and I hope you like the new LXDM Manjaro theme." Read the release announcement for a list of enhancements in this version. Download links: manjaro-xfce-0.8.1-i686.iso (1,461MB, SHA256), manjaro-xfce-0.8.1-x86_64.iso (1,663MB, SHA256).

Thursday, September 20, 2012

[Fix] WinFF Not Working On Ubuntu 12.04 (Precise Pangolin)


If WinFF crashes under Ubuntu 12.04 Precise Pangolin, you can try the solutions given below which may solve your problem. This problem is common after upgrading to Ubuntu 12.04.

Make a backup of the original presets.xml file with this command:

cp ~/.winff/presets.xml presets.xml.back

Let's now replace the old presets.xml file with a new one downloaded from the publisher's website as follows:

cd /tmp

wget -c http://goo.gl/l9cTl -O presets-libavcodec53-v4.xml.gz

 gzip -d presets-libavcodec53-v4.xml.gz

mv presets-libavcodec53-v4.xml ~/.winff/

mv ~/.winff/presets-libavcodec53-v4.xml presets.xml

WinFF should work fine now. If this hasn't solved your problem, you can simply reinstall WinFF with these commands:

rm -rf ~/.winff/

sudo apt-get install --reinstall winff