Tuesday, November 20, 2012

How to Install Dockbar Removed AWN PPA on Ubuntu 12.10


Avant Window Navigator – better known as the AWN – has been (and I think still is) one of the most dockbars popular among Linux users, thanks to its numerous applets and to its numerous configuration possibilities. Unfortunately, however, the development of AWN is still well over a year, which is why Ubuntu developers have seen fit to remove the package installer on the dockbar by repository of Ubuntu 12.10 Quantal Quetzal.

Fortunately there is help Andrew @ Webupd8 who created – within their repository – a package installer latest version of Avant Window Navigator for Ubuntu 12.10 Quantal . Since the development of the dockbar is still a lot ‘of time, however, it is likely that some applets crashino often or even refuse to work. AWN dockbar is still a very useful and well done : worth trying!

AWN (Avant Window Navigator) – Installation on Ubuntu 12.10 Quantal

With repository Webupd8 the process is easy! All you have to do is open a terminal, and type
sudo add-apt-repository ppa: nilarimogard/webupd8
sudo apt-get update sudo apt-
get install avant-window-navigator
On Ubuntu 12.04, 11.10 and earlier find AWN in the system repository.

siduction 12.2.0 RC1


Ferdinand Thommes has announced the availability of the first release candidate for siduction 12.2.0, a desktop Linux distribution based on Debian's unstable branch and featuring four desktop environments - KDE, LXDE, Razor-qt and Xfce: "We are happy to present the first release candidate of siduction 2012.2 - 'Riders on the Storm'. Siduction 2012.2 ships with four desktop environments: KDE, Xfce, LXDE and Razor-qt, all in 32-bit and 64-bit variants. Razor-qt is the latest flavour that joins our regular release cycle after seeing a development release earlier this year. The released images are a snapshot of Debian unstable from 2012-11-19. As the freeze for Debian 7 will still last some months, we take the opportunity to update and consolidate our package base with this new release." Read the detailed release notes for a complete list of new features. Quick links to the KDE edition (for other editions please see the project's download page): siduction-12.2.0~rc1-kde-i386.iso (1,005MB, SHA256), siduction-12.2.0~rc1-kde-amd64.iso (1,008MB, SHA256).

How to Fix MBR or Damaged Partition Table under Ubuntu 12.10/12.04/Linux Mint 13


If you have boot issues which are caused by accidentally deleting a partition table, you can use TestDisk, which is a data recovery software that allows to find lost partitions and repair MBR or damaged partition table.

Here are some features of TestDisk:


  •    Repair partition table
  •    Recover deleted partition
  •    Recover FAT32/NTFS boot sector from its backup
  •    Rebuild FAT12/FAT16/FAT32/NTFS boot sector
  •    Repair FAT tables
  •    Fix MFT using MFT mirror
  •    Locate ext2/ext3/ext4 Backup SuperBlock
  •    Undelete files from FAT, exFAT, NTFS and ext2 filesystem
  •    Copy files from deleted FAT, exFAT, NTFS and ext2/ext3/ext4 partitions


In this tutorial, we will show you how to install and run TestDisk under Ubuntu/Linux Mint to repair your partition table or MBR.

Warning: Use TestDisk at your own risk! We are not liable for any misuse of this tool.

TestDisk Installation

Open the terminal and install TestDisk with this command under Ubuntu 12.10/12.04/Linux Mint 13 or older:

sudo apt-get install testdisk -y

TestDisk Uses

Via the terminal, you can start TestDisk with this command (root privileges required):

sudo testdisk

In the first screen, you will be asked to select whether you want to create a log or not. It is optional, so you can select any option from the list using the arrow keys, then hit Enter:


Select now the media you want to access (hard disk partition) and press Enter:


Select now the partition table type and press Enter:


Highlight now the "Analyze" option and press Enter to search for lost partitions:


At the bottom of the window, leave the "Quick Search" option highlighted and press Enter:


In the newt screen, you will get the structure condition of your disk:


Press Enter to continue, then highlight the "Write" option and press Enter to fix the partition table:


Quit now TestDisk and reboot your system:

sudo reboot

You should now re-gain access to your partition files.

Monday, November 19, 2012

Xnoise 0.2.13 Media Player Relased – Install in Ubuntu 12.10, Xubuntu 12.10 and Linux Mint 14/13


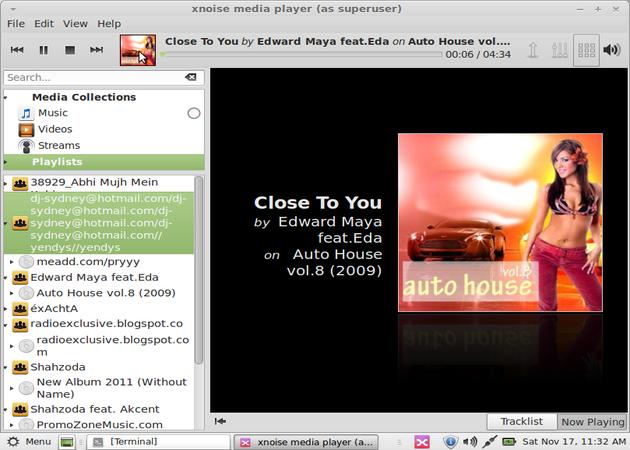
Xnoise is an open source media player for GTK+ with an excellent user interface, great speed and lots of other new features that allows users to listen music and play videos.
Xnoise can able to play every kind of video/audio format data. The Xnoise interface provides a easy search function where you can easily search the library and drag each artist, album or title to the track-list by in any order position.
 
Install Xnoise Media Player in Ubuntu
The queued tracks (audio or video) in track-list are played one-by-one without being removed and can be removed, inserted, re-ordered any track the way you want.
Recently, Xnoise 0.2.13 has been released and integrated a large number of new exciting features.

Xnoise 0.2.13 Features

  1. Added search feature to new Album Art view.
  2. The ‘Now Playing’ image rendering has been re-designed with reflections.
  3. A weblink to keyboard shortcuts integrated in the help menu.
  4. Ctr-B key-binding for toggling album art view has been added.
  5. Volume slider with symbolic icon.
  6. Mingw compatibility fixes.
To know the complete list of other changes and features, visit at xnoise-media-player.
Please watch the attached video by the Xnoise developer, where he demonstrating some of the features available in the Xnoise 0.2.13 version.

Installation of Xnoise 0.2.13 Media Player

From the Desktop, open the terminal by pressing CTRL + ALT + T and run the following commands to install Xnoise Media Player in Ubuntu 12.10/12.04/11.10, Xubuntu 12.10, Linux Mint 14/13.
$ sudo add-apt-repository ppa:shkn/xnoise
$ sudo apt-get update
$ sudo apt-get install xnoise

Starting Xnoise 0.2.13 Media Player

Run the following command from the Desktop to start the Xnoise Media Player.
$ sudo xnoise
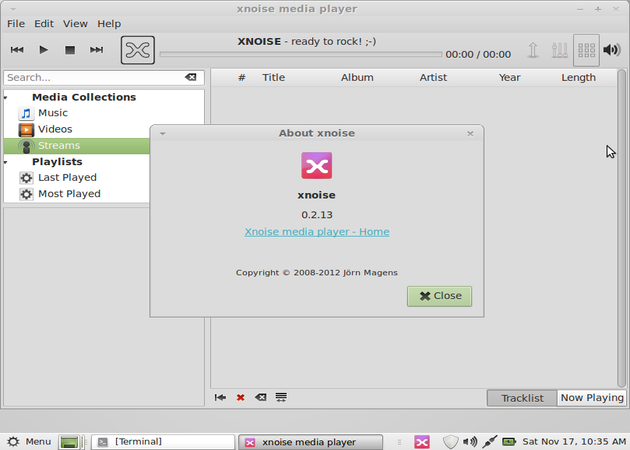
Xnoise Media Player Screenshots

 
Xnoise Media Player under Ubuntu
Xnoise Media Player in Ubuntu
Xnoise sources are available for download for other Linux distributions via GitHub.

Nautilus 3.6.3 Install it on Ubuntu 13:04 Raring Ringtail


Remember the story of Nautilus on Ubuntu 12.10: was initially decided to use the version 3.6 of Nautilus, The GNOME file manager (and Ubuntu), the release of which would take place in time for inclusion in Quantal. The development release of the Ubuntu 12.10 was even included Nautilus 3.5.x making everyone believe that the transition from Nautilus Nautilus 3.4 to 3.6 would come soon … but, due to the removal of some features considered essential by a circle of users and due to the lack of integration of Nautilus 3.6 with some of the mechanisms of the Unity desktop (first of all the lack of integration with HUD ), surprisingly it was decided to take a step back and return to Nautilus 3.4: to date Ubuntu 12.10 Quantal Quetzal <strong > is distributed with Nautilus 3.4.

During the last UDS-R has broached the subject Nautilus: would have chosen to integrate within Ubuntu 13.04 Raring Ringtail a review of Nautilus 3.6 as there would be time – during the development cycle – to make the filemanager compatible with the mechanisms of the Unity desktop and also integrate some of functionalities of the future desktop manager Nautilus 3.8 (booming). In practice, the version of Nautilus included in Ubuntu 4.13 should be a “mix” between Nautilus Nautilus 3.6 and 3.8.
Who will prevail? In all likelihood, the “carrier” of the “mix up” Nautilus belong to version 3.6 , as within the repository of Ubuntu 13.04 Raring Ringtail arrived a few days ago, Nautilus 3.6.3: if the base had been, however, Nautilus 3.8 … in all probability in the repository Raring would present the current development version of the file manager (the 3.7).
Ultimately in Ubuntu 13.04 Raring is likely to be present Nautilus 3.6 with some features specific to Nautilus 3.8. What are these? We’ll let you know as soon as we have more news.

How to Run Steam Inside a Container LXC on Ubuntu


We are talking about now days Steam beta version of Ubuntu and we also learned to bypass the limits imposed by the beta program. You may notice that Steam, , however, is 32-bit version and Valve is recommended for use only on Ubuntu 12.04 LTS. Personally I also tried Steam beta of Ubuntu 12.10 32-bit and found no major problems, but it seems my luck has been : I have heard several complaints from users <strong > Ubuntu 12.10 64-bit , as Steam refuses to work on that operating system (probably because of multiarch support that seems to still some problems).

Running Steam in a virtual environment complete (which could be VirtualBox or VMWare ) be a real blow for your operating system and your brain , as you would be required to configure the virtual machine to the smallest detail, so not have problems to access the 3D rendering direct host and to enjoy your favorite games, audio direct. Why, then, do not use a so-called “container”, a virtual environment (rather complex to use) that uses few system resources and can be accessed without any problem at all system devices?
Stéphane Graber has done by writing a program in Python, this Steam-LXC that allows you to automatically configure a container – to run Steam on Ubuntu – using a virtual Ubuntu 12.04 32-bit capable to access hardware acceleration and direct audio system. The container is chosen by Steph LXC , virtual environment that uses hardly any system resources, used mainly in mechanisms of testing (I LXC used quite often too), especially during the development of kernel / modules / applications in general that need testing on multiple architectures. LXC turns out to be, in fact, one of the containers more scalable and reconfigurable on the existing scene, earning the alter-ego of “chroot on steroids.”
Before continuing I want to let you know that Steam-LXC has been tested only of <strong > Ubuntu 13.04 64-bit Raring using a video card Intel , and there is a possibility of have some problems of video hardware that are used proprietary drivers ( the nVidia or Catalyst, so to speak), there should be no problems, however, with the open drivers Nouveau or Radeon. In all cases .. any feedback is welcome!

Ubuntu – Installation of Steam-LXC

Install the preconfigured container is absolutely simple! Stéph provides us with a convenient PPA (for Ubuntu 12.04, 12.10 and 13.04) to proceed. All you have to do is open a terminal, and type
sudo add-apt-repository ppa: ubuntu-lxc/stable
sudo apt-get sudo update
apt-get install steam-LXC

Into Then, it is the first time we use LXC , we need to create the directory dedicated to the container, with the command
sudo mkdir -p / var / lib / LXC / var / cache / LXC
After that we prepare the environment and download everything you need (including Steam) to test it, do not worry, things will be done automatically! Also from the terminal, type
sudo steam-LXC create
and wait for the completion of the process (the time will vary depending on the speed of your internet connection, it may take up to an hour). Without this there is nothing left to run Steam virtual environment just created with the command
sudo steam-LXC run
Into Enjoy!
[geeks] as you can see doing so you will not be able to run Steam bypassing the limitations of the beta. I gave a fleeting look at the code of the script and I concluded that, in order to be able to bypass the limitations of the beta, you should change the boot command Steam inside the python script. To do this, from the terminal, type
sudo gedit / usr / bin / steam-LXC
located this piece of code
self.run_command ("DISPLAY =% s =% s PULSE_SERVER steam"%
and turn it into
self.run_command ("DISPLAY =% s =% s PULSE_SERVER steam steam :/ / open / games"%
Then start Steam in LXC with the command
sudo steam-LXC run
should work perfectly!
NB: you can also use the container to run Steam on the official Ubuntu variants (X / K / L / Edubuntu) – making sure that the dependencies are installed inside the container and not on your operating system .