Sunday, October 28, 2012

Ubuntu 13.04 Will Run on the Google Nexus 7 Tablet


Jono Bacon announced yesterday, October 26th, on his personal blog that the upcoming Ubuntu 13.04 (Raring Ringtail) operating system will support the Nexus 7 tablet from Google. 
 The Ubuntu Developer Summit for Ubuntu 13.04 will start next Monday, on October 29th and the development team is preparing to give attendees a demonstration of Ubuntu OS on the Google Nexus 7 tablet.

“A core goal for Ubuntu 13.04 is to get Ubuntu running on a Nexus 7 tablet. To be clear, this is not going to be a tablet Unity interface running on the 8/16GB Nexus 7,” said Jono Bacon on his blog.

“But instead will focus on getting the current Ubuntu Desktop running on the Nexus so that we can ensure pieces such as the kernel, power management and other related areas are working effectively on a tablet device.” he continued.

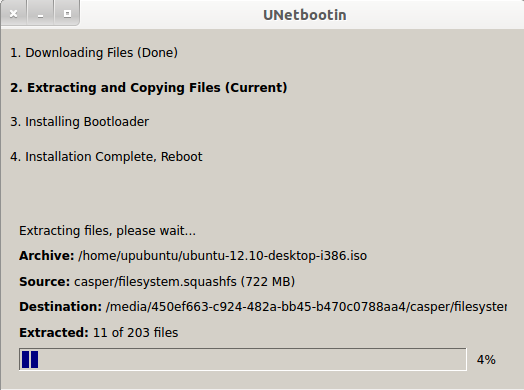
However, the good news is that Canonical already tested the Ubuntu 12.04 LTS (Precise Pangolin) and Ubuntu 12.10 (Quantal Quetzal) releases on Nexus 7, and they provide a native installer for it, called Ubuntu Nexus 7 Desktop Installer, with step by step installation instructions (with screenshots).


 Unfortunately, we don’t have a Google Nexus 7 tablet so we can test the Ubuntu operating system on it, but from the Ubuntu Wiki page above it looks like the installation is pretty simple. Basically you’ll have to add the PPA for the installer, unlock your tablet, and install Ubuntu on Nexus 7.

If you don’t have a Nexus 7 tablet from Google and you want to buy one, just in case you would like to install Ubuntu on it, please visit its official website.

Don’t forget to visit our website next week, as we will cover the entire Ubuntu Developer Summit for Ubuntu 13.04 event and give you all the latest news from the Canonical world.

How To Install Azenis Icons (Green/Orange/Blue) From PPA In Ubuntu 12.10/12.04/Linux Mint 13


In this tutorial, we will see how to install Azenis Icons from PPA under Ubuntu/Linux Mint. This icon theme is available in three different colors which we will see how to enable them as described below. Here are screenshots of 'Azenis Icons' under Ubuntu:


The PPA is compatible with the following Linux distributions:

  • Ubuntu 12.10/12.04/11.10
  • Linux Mint 13/12
Azenis Icons Installation

Open the terminal and run these commands:

sudo add-apt-repository ppa:upubuntu-com/icons
sudo apt-get update
sudo apt-get install azenis-icons

Enable now the different Azenis icon colors with these commands:

* Azenis Green Icons:

 gsettings set org.gnome.desktop.interface icon-theme 'Azenis Icons Green'

* Azenis Blue Icons:

 gsettings set org.gnome.desktop.interface icon-theme 'Azenis Icons Blue'

* Azenis Orange Icons:

 gsettings set org.gnome.desktop.interface icon-theme 'Azenis Orange Icons'

Install New BeatBox 0.7 Music Player in Ubuntu 12.10


The new BeatBox music player released in version 0.7, come with new user interface enhancements and new features. The preferences window has been revamped to include preferences for plugins as well as a more robust UI for general settings. in addition, beatbox 0.7 also introduces plugin support with dedicated category. So, enabling or disabling a specific plugin is to be easily.
BeatBox media player is a comfortable, easy to use media player to player, stable, but especially fast, written in  Vala . With  Beatbox  have the chance to play music in shuffle mode and cyclic edit the metadata of the tracks, perform quick searches within the library, edit playlists, view album art,  playlists, podcasts, Internet radio,   and synchronize your player with our account  Last.FM.

Here’s New Change of Beatbox 0.7:

  • Plugin support
  • DB upgrading, which means no longer having to delete your db for new versions.
  • Better last.fm authentication
  • Smart auto scroll to current song
  • Fixed issue where list view became horizontally scrolled unnecessarily
  • Gapless playback
  • Much faster startup
  • Multi-library management. Podcasts now are a truly separate library with a separate folder associated it.
  • More detail, found it @BeatBox Release Announcement

Install BeatBox 0.7 in Ubuntu Based Distro

BeatBox 0.7 Install New BeatBox 0.7 Music Player in Ubuntu 12.10
To install BeatBox 0.7 in Ubuntu 12.04,ubuntu 12.10 and Linux Mint 13, you can add the following PPA:
sudo add-apt-repository ppa:sgringwe/beatbox
sudo apt-get update
sudo apt-get install beatbox
If you want to make BeatBox available in sound menu do the following tips, open terminal then install dconf-tool
sudo apt-get install dconf-tool
Open dconf-tool from unity dash, in dconf-tool navigate to com -> canonical -> indicator -> sound, double-click “Value” of interested-media-players then add ‘beatbox’ after ‘rhythmbox’.

Install Insync Google Drive Client on Ubuntu or Linux Mint


Insync caters to power and business users who have different needs from the average consumer — needs that are not being fulfilled by Google Drive.
Insync, an unofficial Google Drive client for Linux, is now available in a repository for Ubuntu, Linux Mint and Debian users and it's recommended you add since you'll get automatic updates.

Changes in latest version:

  • fixed symlinks not live syncing (before you had to restart Insync for changes to be detected)
  • Nautilus context menu will not show outside of the Insync folder.
  • Applets now have a pause/resume button to start/stop Insync from downloading and uploading.
  • Gdocs are now downloaded in Open Document Format
  • Built with Debian, fixes GLIBC error for Debian users.

Add Repository in Ubuntu:
echo "deb http://apt.insynchq.com/ubuntu $(lsb_release -cs) non-free" | sudo tee /etc/apt/sources.list.d/insync.list

Add Repository in Linux Mint:
echo "deb http://apt.insynchq.com/mint $(lsb_release -cs) non-free" | sudo tee /etc/apt/sources.list.d/insync.list

Add Repository in Debian:
echo "deb http://apt.insynchq.com/debian $(lsb_release -cs) non-free" | sudo tee -a /etc/apt/sources.list

After adding repository enter following commands for import key and apt update
wget -O - https://d2t3ff60b2tol4.cloudfront.net/services@insynchq.com.gpg.key | sudo apt-key add -
sudo apt-get update

Now install Insync Drive:
- For Unity (AppIndicator)
sudo apt-get install insync-beta-ubuntu

- For Gnome-Shell
sudo apt-get install insync-beta-gnome

- For Cinnamon
sudo apt-get install insync-beta-cinnamon

- For Kde4
sudo apt-get install insync-beta-kde

Download insync for other distributions.

Mozilla firefox 16.0.2 released


Mozilla firefox 16.0.2 final is now available for download.This is a security fix release.
what’s new in this firefox 16.0.2?
Fixed Security Vulnerability in Firefox 16.0.1.
Fixes for Location object issues.This is a critical Vulnerability.

Download Mozilla firefox 16.0.2

FreeNAS 8.3.0

FreeNAS
Josh Paetzel has announced the release of FreeNAS 8.3.0, a free and open-source Network-Attached Storage (NAS) operating system based on FreeBSD: "The FreeNAS development team is pleased to announce the immediate availability of FreeNAS 8.3.0-RELEASE. FreeNAS 8.3.0 is based on FreeBSD 8.3 with version 28 of the ZFS file system. This is a major milestone in FreeNAS development, bringing in the plugin system with ZFS version 28. Development of the FreeNAS 8.2 branch has come to a halt, as both ZFS version 15 as well as FreeBSD 8.2 are no longer supported. There have been no major changes between 8.3.0-RC1 and RELEASE, mostly bug fixes and minor usability improvements to the GUI." See the release announcement and release notes for further information. Download (SHA256): FreeNAS-8.3.0-RELEASE-x86.iso (103MB) FreeNAS-8.3.0-RELEASE-amd64.iso (112MB).

How To Create A Live USB For Ubuntu 12.10 Quantal Quetzal


In this tutorial, we will see three methods for creating a live USB for Ubuntu 12.10 Quantal Quetzal. Creating live USBs will be very useful mainly for users of netbooks, laptops, and tablets. This tutorial is also applicable for other Linux distributions (Linux Mint 13, Debian Squeeze, etc.).

Preparing The USB Flash Drive

To be able to install a Linux distribution on a USB stick, it's recommended that you format it as ext4, but you can choose any other file system. Let's first identify your USB device using this command:

df -h

For my system, the USB drive is mounted as /dev/sdb1:


Change /dev/sdb1 with the name of your USB stick and run these commands to format it as ext4:

sudo umount /dev/sdb1

sudo mkfs.ext4 /dev/sdb1

If you want to format it as FAT32, run these commands:

sudo umount /dev/sdb1

sudo mkfs.vfat /dev/sdb1

Finally, remount your USB drive. See now below for ways to create a live Ubuntu USB.

1. Startup Disk Creator

If you are under Ubuntu, you can simply use Startup Disk Creator to create a live USB. Via Unity Dash, search and open Startup Disk Creator:


Click "Other" and select the Ubuntu 12.10 iso file, then click "Make Startup Disk":


2. UNetbootin

UNetbootin is a tool with GUI that allows users to create live usbs for various Linux distributions. To install it under Ubuntu/Linux Mint, run this command:

sudo apt-get install unetbootin

For RPM-based systems, you can install UNetbootin with this command:

sudo yum install unetbootin

From the main interface of UNetbootin, select "Diskimage" and click the browse button, then select the image of Ubuntu 12.10 from your hard drive:


Select now Type > USB Drive and Drive: /dev/sdb1, then click OK to create the live USB:


Wait now while your image is being exported to the USB drive:


At the end of the operation, reboot your system and boot from the USB drive.

3. Create a Live USB Via The Terminal

In the terminal, run this command to create a live usb for Ubuntu 12.10:

sudo dd if=/ubuntu-12.10-desktop-i386.iso of=/dev/sdb1 bs=1M

- /path/to/ubuntu-12.10.iso  --> Replace it with the full path to Ubuntu 12.10 iso image.
- /dev/sdb1 --> Replace it with the name of your USB drive.