Sunday, September 9, 2012

How To Install Nvidia Drivers Using Recovery Mode Under Ubuntu 12.10/12.04/11.10/Linux Mint 13


If you find troubles installing the latest Nvidia driver on your system in normal mode or having graphics related problems (black screen with white flashing underscore, for example), you can try to install the Nvidia driver via Recovery Mode as described below.

Nvidia graphics problems may not be solved for all users after using this method because it depends on the hardware and software used (graphics card model, kernel version, etc.).

Getting Started

To enter in Recovery Mode under Ubuntu 12.10/12.04/11.10 and Linux Mint 13 or older, reboot your system and hold down the SHIFT key to bring up the GRUB boot menu. When it shows up, select the line saying "Ubuntu... (recovery mode)" and press Enter:


For Linux Mint, select " Linux Mint ... --recovery ...":


Wait a few seconds and another menu will appear. Select "network Enable networking" using your keyboard Down arrow key  and press Enter to enable your internet connection:


In the next screen, select Yes and press Enter:


Select now "root Drop to root shell prompt" and press Enter:


You are now in CLI mode, update your system firstly using these two commands:

sudo apt-get update

 sudo apt-get upgrade

Install now the latest Nvidia driver (currently version 304.43) from PPA using this sequence of commands:

sudo apt-add-repository ppa:ubuntu-x-swat/x-updates
sudo apt-get update
sudo apt-get install nvidia-current nvidia-settings

When you finish the driver installation, exit from Recovery Mode using this command:

exit

Then select "Resume normal  boot" to start your system in normal mode. I hope you find this tutorial useful.

How To Create ISO File From CD/DVD-ROM Using The Terminal - Ubuntu/Linux Mint


In this tip, we will see how to use the terminal under Ubuntu/Linux Mint to create ISO images of CDs or DVDs inserted into your CD/DVD-ROM drive. The command line tool that we will use is dd which allows to make backup copies of your CD/DVD discs and hard drives.

Getting Started

1. Check firstly where your CD/DVD is mounted using this command:

mount

For my system, the CD is mounted as /dev/sr0:


2. I need now to unmount it with this command:

umount /dev/sr0

Replace /dev/sr0 with your own details as displayed in the output of the "mount" command.

3. Create now the iso image with this command:

dd if=/dev/sr0 of=~/image.iso

  /dev/sr0 --> the input that we will read from

  ~/image.iso --> the name of the iso image that will be created (the iso file will be created in your home, but you can set any other path of your choice)

Note: if you are creating the iso image in a system folder, don't forget to add "sudo" at the beginning of the command.

Also, if you want to add a progress bar for the dd command, install the dcfldd package:

sudo apt-get install dcfldd

The command for creating the ISO image will be as follows:

dcfldd if=/dev/sr0 of=~/image.iso

PV also allows to display a progress bar for the dd command. Install it on Ubuntu/Linux Mint:

sudo apt-get install pv

Then create the iso file using this command:

dd if=/dev/sr0 | pv | dd of=~/image.iso

Saturday, September 8, 2012

Network Security Toolkit 2.16.0-4104


Ronald W. Henderson has announced the release of an updated build of Network Security Toolkit (NST), a Fedora based live DVD with a good collection of open-source network security applications: "We are pleased to announce the latest NST release: version 2.16.0-4104. This release is based on Fedora 16 using Linux kernel 3.4.9. This is a interim release which includes all of the NST and Fedora 16 package updates since 2012-02-27 rolled into a fresh ISO image. If you are building your own NST yum repository or have a subscription to the NST PRO yum repository, you may not need this ISO image as you should be able to simply 'yum update' you NST system(s). The NST project team has worked with the CloudShark folks to facilitate uploading and viewing network packet captures generated by an NST system to either CloudShark.org or a CloudShark Appliance. A new CloudShark Upload Manager tool was created and embedded within the NST WUI to accomplish this. Visit the project's home page to read the full announcement. Download: nst-2.16.0-4104.i686.iso (1,441MB).

Mageia 3 Alpha 1


Anne Nicolas has announced that, after a brief delay, the first development build of Mageia 3 is ready for download and testing: "Mageia 3 is on the way and here is the first alpha release. We are now waiting for your tests. As usual, you will find installation DVD images and dual-architecture CD images. However, live CDs are not available. They rely on a specific file system, Unionfs, but Unionfs is not included in the upstream kernel and has to be rebuilt for every new kernel version. It seems that it does not work properly on the 3.5 kernel series. We are investigating the issue, but since Unionfs seems to be unmaintained upstream at the moment, we need to either fix it and maintain it ourselves or we need to switch to another file system like Aufs or OverlayFS." The first alpha release of Mageia 3 comes with Linux kernel 3.5.3, KDE 4.9.0, and GNOME 3.5.91. Read the release announcement and release notes for a brief feature list. Download: Mageia-3-alpha1-i586-DVD.iso (3,542MB, MD5, torrent), Mageia-3-alpha1-x86_64-DVD.iso (3,607MB, MD5, torrent).

Zentyal 3.0 RC2


Heidi Vilppola has announced the availability of the second and final release candidate for Zentyal 3.0, an Ubuntu-based server distribution: "The Zentyal development team is glad to announce that the second release candidate of Zentyal 3.0 is now available for download and testing. This version is based on the new Ubuntu 12.04.1 installer and besides all the bug fixing done since the first release candidate, it features a new Samba 4.0 beta8 and lots of additional improvements and polishing. The release of the Zentyal 3.0 is almost here, so your help in finding bugs now is more important than ever to make Zentyal 3.0 the best release in history. So, don't forget to report any bugs you come up with, either through the bug tracker or the official Zentyal forum." See the release announcement to find out how to get a free Zentyal T-shirt. Download: zentyal-3.0-rc2-i386.iso (545MB, MD5), zentyal-3.0-rc2-amd64.iso (559MB, MD5).

Install BRL-CAD 7.22.0 From PPA On Ubuntu 12.10/12.04/Linux Mint 13


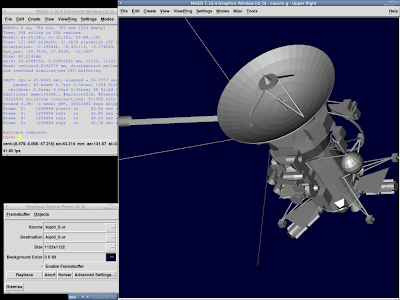
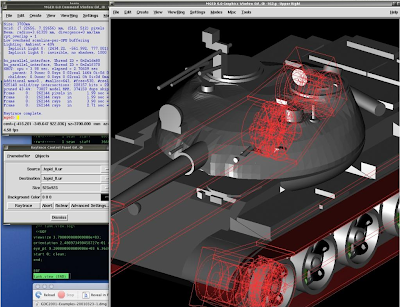
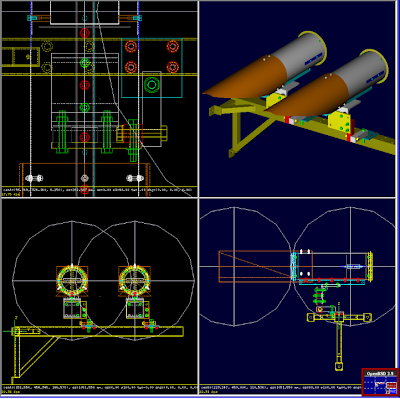
BRL-CAD is a CSG (constructive solid geometry) solid modeling CAD system with powerful features that has similarities with AutoCad. With BRL-CAD, developers can design amazing 2D/3D objects (drawings) that can be close to reality in terms of model accuracy and precision. Here are some of the features of BRL-CAD:


Interactive geometry editor

Ray-tracing for rendering & geometric analyses

Network distributed framebuffer support

Image & signal-processing tools, etc.


Version 7.22.0 of BRL-CAD is the fruit of more than six months of development which includes many changes and improvements compared to previous versions. You can get further information about what has changed in this latest release here. In this tutorial, we will help you install BRL-CAD from PPA under Ubuntu 12.10/12.04/11.10 and Linux Mint 13.

BRL-CAD Installation

Open the terminal and run the following commands to install BRL-CAD on i386 systems:

sudo add-apt-repository ppa:upubuntu-com/brlcad
sudo apt-get update
sudo apt-get install brlcad

For amd64 systems, install BRL-CAD with these commands:

sudo add-apt-repository ppa:upubuntu-com/brlcad64
sudo apt-get update
sudo apt-get install brlcad

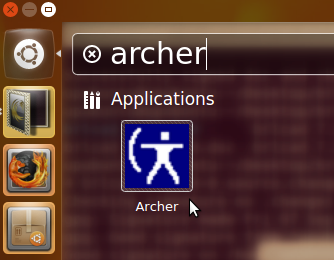
You can then start the application from the Unity dash by searching "archer":


BRL-CAD Home Page