Tuesday, September 25, 2012

Unity Dash Searches Will Be Encrypted in Ubuntu 12.10


A lot of people expressed security concerns about the integration of an Amazon lens into the Home lens in Ubuntu 12.10, but Canonical is making sure that users’ privacy will be respected.

Mark Shuttleworh, founder of Canonical, tried to address some of the problems that were mentioned by users, but the backlash of this new feature in Ubuntu 12.10 has caused quite a stir in the community.

So far, the traffic made through the Unity Dash, towards Amazon and through Canonical's servers, has not been encrypted, but Canonical assured us that this would change with the final version of Ubuntu 12.10.

Jono Bacon, community manager at Ubuntu, posted on his blog a response from John Lenton, the senior engineering manager in the Online Services team at Canonical.

We appreciate some of the community concerns about these searches operating unencrypted and we are currently working to encrypt these dash searches ready for the release of this feature in Ubuntu 12.10. This should resolve most of the concerns shared about unencrypted traffic.


This is certainly good news and the protests will get quiet for a while, at least until Ubuntu 12.10 (Quantal Quetzal) is officially released.

How To Adjust Laptop/Notebook Battery Charge Threshold Under Ubuntu 12.10/12.04/Linux Mint 13


In this tutorial we will see how to adjust charge threshold of a laptop/notebook battery under a system running Ubuntu 12.10/12.04/Linux Mint 13 or older. This will help you set when you want to start and stop battery charging when the laptop is connected to AC power. This is useful for extending battery life of your laptop, but keep in mind that this will reduce runtime.


Note: This tutorial is applicable mainly for Lenovo's ThinkPad laptops and notebooks.
Getting Started

To get information about your laptop battery, run this command:


cat /proc/acpi/battery/BAT0/info
Open the terminal and install the "tp-smapi-dkms" package with this command:

sudo apt-get install tp-smapi-dkms

To check if the module is well loaded, run this command:

lsmod | grep tp_smapi

To set when charge threshold start, run this command:

echo 60 > /sys/devices/platform/smapi/BAT0/start_charge_thresh

Replace 60 with any other battery level percentage of your choice.

To set when charge threshold stops, run this command:

echo 95 > /sys/devices/platform/smapi/BAT0/stop_charge_thresh

In the two commands given above, battery charge threshold will start at 60% and stop at 95%. You can set your own battery threshold percentages depending on the battery size you have and for how long you want to use your laptop.

To run the commands given above automatically at system startup, edit the rc.local file with this command:

sudo gedit /etc/rc.local

For Linux Mint:

sudo pluma /etc/rc.local

And enter the two commands at the end of the file just above "exit 0", then save and close:


Note: This tutorial may not work with all laptops. If you have something to add, please use the comment form listed below.

Install Nvidia Driver 304.51 On Ubuntu 12.10/12.04/Linux Mint 13


Nvidia Driver 304.51 for Linux is now available for download from the Nvidia website which brings more bug fixes, improvements and long support until 2017. The driver adds support for Quadro Sync board for Quadro Kepler GPUs. Here are the full changes in this latest release:


Fixed an X server crash on X.Org xserver 1.13 when it is compiled without support for DRI2.
Fixed a regression that broke color controls on older X servers.
Fixed a bug that sometimes caused the display layout area of the nvidia-settings control panel to be laid out incorrectly.
Fixed a bug that prevented panning from working correctly after a modeswitch on some X servers with support for cursor constraining.
Gamma ramp and colormap adjustments now apply correctly when screen transformations such as rotation and keystone correction are in use.
Fixed RandR per-CRTC gamma persistence across modeswitches and VT-switches.
Fixed a bug that caused the X server to sometimes hang in response to input events.
Fixed a reduction in rendering performance for core X11 rendering on certain GPUs that occurred in the 290.series of releases.
Fixed a bug that prevented PowerMizer from working correctly on some boards with GDDR5 memory, such as some GeForce GT 240 SKUs.
Fixed a bug that caused OpenGL applications to not animate properly when a rotation or a transformation was applied on some older X server versions.
Enabled FXAA with Unified Back Buffers.
Fixed a bug that prevented the "Reset Hardware Defaults" button in the Display Settings page of nvidia-settings from being activated.

Driver Installation

   1. Automatic Installation (PPA Installation)

To install Nvidia Driver 304.51 from PPA, open the terminal and run the following commands for Ubuntu 12.10/12.04/11.10 or Linux Mint 13/12:

sudo apt-add-repository ppa:ubuntu-x-swat/x-updates
sudo apt-get update
sudo apt-get install nvidia-current nvidia-settings

   2. Manual Installation 

If you want to install Nvidia Driver 304.51 manually from *.run files, you can simply follow these instructions for both i386 or amd64 platforms:

- Press CTRL+ALT+F1 and enter your login credentials.

- Kill now the Xserver with this command:

sudo service lightdm stop

- Install now the driver with these commands:

cd /tmp

wget -c  http://dl.dropbox.com/u/47950494/upubuntu.com/nvidia-304-51

chmod +x nvidia-304-51

sudo sh nvidia-304-51

Then follow setup instructions. If the driver is well installed, you can exit Xserver and return to GUI mode with this command:

startx

Finally, reboot your system to apply the new changes. If you find problems installing the Nvidia drivers using these methods, you can try to install it using Recovery Mode as described here.

Install/Upgrade To PHP 5.4.6 Under Ubuntu 12.04/11.10/Linux Mint 13/12


In this tutorial we will see how to install or upgrade to PHP 5.4.6 using an external PPA provided by Ondřej Surý which supports Ubuntu 12.04/11.10 or older and any Ubuntu-based system like Linux Mint 13/12. PHP 5.4.6 fixes many bugs, you can check the full changelog of version 5.4.6 here.  PHP 5.4.7 is also released and still not available in the PPA, but will be added soon.

If you haven't already installed Apache2 and MySQL on your system, then do with the following commands:

sudo apt-get install -y mysql-server mysql-client apache2

Installing PHP 5.4.6

Via the terminal, issue these commands:

sudo add-apt-repository -y ppa:ondrej/php5
sudo apt-get update
sudo apt-get install -y php5 libapache2-mod-php5

Restart now Apache2 with this command:

sudo /etc/init.d/apache2 restart

To check if the installation of PHP 5.4.6 is successful, run this command:

php5 -v

$  php5 -v
PHP 5.4.6-2~precise+1 (cli) (built: Aug 30 2012 14:38:34)
Copyright (c) 1997-2012 The PHP Group
Zend Engine v2.4.0, Copyright (c) 1998-2012 Zend Technologie

Or create a PHP file with this command:

echo "" | sudo tee /var/www/test.php

Restart Apache2:

sudo /etc/init.d/apache2 restart

Open now this URL (replace localhost with your own server IP address if needed):

http://localhost/test.php


Monday, September 24, 2012

How to Record Screencasts as Animated GIFs under Ubuntu 12.10/12.04/11.10/Linux Mint 13


A screencast is the recording of computer screen (aka screen capture) with the help of screen recording software. If you want to convert these screencasts into animated GIFs to use them on your blog or website, then this tutorial will explain this using two methods under Ubuntu/Linux Mint.

Method 1

The first method consists of using Byzanz which allows to record screencasts as GIFs. To install it under Ubuntu 12.10/12.04/11.10 or Linux Mint 13/12, open the terminal and run these commands:

sudo add-apt-repository -y ppa:fossfreedom/byzanz
sudo apt-get update
sudo apt-get install -y byzanz

You can now use this comman to record GIF screencasts (replace details with your own):

byzanz-record --duration=15 --x=400 --y=400 --width=800 --height=600 output.gif

For more help about the use of Byzanz, run this command:

byzanz-record --help


Note: The GIF file will be saved in the current terminal location.
Method 2

The second method is a little bit complicated because we will use a screen capturing tool to record a screencast, convert this video to images (JPG), then converting these images to an animated GIF. Let's firstly install needed packages with this command:

sudo apt-get install imagemagick gtk-recordmydesktop mplayer

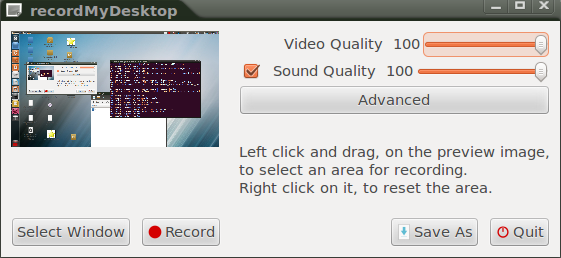
Start now the recordMyDesktop application and record a screencast, then save it in any folder of your choice (.ogv format).


Let's now save this video in JPG screenshots with this command:

mplayer -ao null video.ogv -vo jpeg:outdir=mypics

video.ogv -> Replace it with your own video file name.
mypics -> This is the name of the folder that will contain the extracted JPEG files. Rename it to whatever you want.

Using the terminal, cd to the folder containing JPEG screenshots and run this command:

convert * file.gif

If you have extracted the JPEG files in a folder containing various file formats, then run this command instead:

convert *.jpg file.gif

Rename file.gif with any name of your choice. The conversion may take time depending on the total size of JPEG files.

To optimize this GIF file, you can use this command:

convert file.gif -fuzz 15% -layers Optimize file-optimized.gif

Sunday, September 23, 2012

How To Disable Recovery Mode Under Ubuntu 12.10/12.04/Linux Mint 13


RecoveryMode is very useful for users who have boot issues because it will help them repair their systems using CLI mode with root privileges. The problem here is that unauthorized users who may have access into Recovery Mode would have root permissions on your system files without the need to enter the root password. If you are a bit concerned about this security issue, you can disable Recovery Mode using the instructions given below.


WARNING: Disable "Recovery Mode" at your own risk! Any incorrect modification may render your system unusable or unbootable.
The tutorial will help you disable Recovery Mode under Ubuntu 12.10/12.04/11.10, Linux Mint 13/12 or older. Here is how the Grub boot menu will look before and after modifications:


But firstly, let's backup the file we are going to edit with this command:

sudo cp /boot/grub/grub.cfg /boot/grub/grub.cfg.back

Edit now grub.cfg with this command:

sudo gedit /boot/grub/grub.cfg

For Linux Mint, edit it with this command:

sudo pluma /boot/grub/grub.cfg

In this file, press CTRL+F and search for "recovery" without quotes. The lines related to recovery mode should be commented all in order to disable RecoveryMode. They will be represented as follows:

menuentry 'Ubuntu, with Linux x.x.x- (...) (recovery mode)' (...) {
(...)
(...)
(...)
}

After being commented, they would look like this:

# menuentry 'Ubuntu, with Linux x.x.x- (...) (recovery mode)' (...) {
# (...)
# (...)
# (...)
# }

Here is a real example:

Click To Enlarge

After commenting all lines related to Recovery Mode, save your file and reboot your system. Hold down the SHIFT key to bring up the GRUB boot menu. If your modifications are correct, Recovery Mode line will not appear in the boot menu:


To enable Recovery Mode, run this command from the terminal:

sudo cp /boot/grub/grub.cfg.back /boot/grub/grub.cfg