Sunday, September 30, 2012

How To Install Joomla 3.0 CMS On Ubuntu 12.10/12.04/Linux Mint 13


Joomla 3.0, a popular content management system (CMS), has been released recently bringing more new features, improvements, and is optimized now for mobile devices thanks to the Twitter Bootstrap framework.

This new mobile capability allows websites and blogs using the Joomla CMS to display content on mobile devices like you do on PCs. Also, Twitter Bootstrap is a toolkit that allows to create web applications and websites.

 Here are the new features in this latest release:


    Incorporation of Twitter Bootstrap into a jui media package.
    A new responsive, mobile device friendly administrator template--Isis-- and interface.
    A new front end template--Protostar-- built using Twitter Bootstrap.
    Updated accessible template called Beez3.
    A simplified 3-step installation process.
    PostgreSQL Driver. You will be able to run Joomla 3.0 sites using the PostgreSQL database.
    PHP Memcached Driver
    Use of JFeed for feed management rather than SimplePie
    Installation of language packages directly from the extension manager
    Guest user group present by default
    Saving blank articles allowed
    New administrator statistics module
    Update TinyMCE to version 3.5.6
    Continued clean up of older unused code, files and database fields and tables and improved standardization of tables.
    Improvements to Smart Search
    Extensive work on code style standardisation and consistency
    Unit testing in the CMS
    Updated system tests in the CMS
    Custom active menu item for menu module
    Let the SEF plug-in add the canonical url to the head
    Version 12.2 of the Joomla Platform

In this tutorial, we will help you install Joomla 3.0 on the following Linux distributions:

  • Ubuntu 12.10 / Ubuntu 12.04 / Ubuntu 11.10
  • Linux Mint 13 / Linux Mint 12
Getting Started

   1. Installing A Web Server

There are many options for installing a web server on Ubuntu/Linux Mint. You can use either LAMP, XAMPP, or just install the Apache, MySQL and PHP packages manually. In this tutorial we will use the LAMP server which can be installed with this single command:

sudo apt-get install lamp-server^

You can also install phpMyAdmin with this command for managing MySQL users & databases:

sudo apt-get install libapache2-mod-auth-mysql phpmyadmin

Finally restart Apache with this command:

sudo /etc/init.d/apache2 restart
You can find more information about installing the LAMP web server and phpMyAdmin here.

   2. Configuring Joomla and Apache

Run now these commands to add a Joomla config file to Apache:

cd /etc/apache2/

sudo cp sites-available/default sites-available/joomla

Next, enable the Joomla website with these commands:

sudo a2ensite joomla

sudo /etc/init.d/apache2 restart

   3. Creating A MYSQL User and Database

You can do it with two options. Either with phpMyAdmin by opening this URL (replace localhost with your server IP address if needed):

http://localhost/phpmyadmin/

Or you can simply create all MYSQL details in CLI mode by running these sequence of commands:

mysql -u root -p

create database joomla;

CREATE USER 'joomla'@'localhost' IDENTIFIED BY '1234';

GRANT ALL PRIVILEGES ON joomla.* TO 'joomla' IDENTIFIED BY '1234';

exit

Replace 1234 with any password of your choice. The MySQL details that we have generated are as follows:

  • Database name: joomla
  • Database user: joomla
  • Database password: 1234
We will need this information later when installing Joomla 3.0 via the web browser.

   4. Installing Joomla 3.0

Via the terminal download and install Joomla 3.0 with the following commands:

sudo mkdir /var/www/joomla

cd /tmp

wget -c http://goo.gl/G6tQ5 -O Joomla_3.0.0-Stable-Full_Package.zip

sudo unzip -q Joomla_3*.zip -d /var/www/joomla

sudo chown -R www-data.www-data /var/www/joomla/

Note: Joomla recommends that Output Buffering is turned off, you can find here how to this under Ubuntu/Linux Mint.

You can now start the installation of Joomla 3.0 via your web browser by opening this link (replace localhost with your IP address if you are installing on a server):

http://localhost/joomla

If you find access permission problems to the Joomla website, you can run this command:

sudo chmod 777 -R /var/www/joomla/

In the first page "Main Configuration", enter information related to your website and admin details:


In the second page "Database Configuration", enter your MySQL settings as follows:

  • Database Type:   MySQL
  • Hostname:   localhost
  • Username:   joomla
  • Password:   The password selected for your database
  • Database Name:   joomla

In the last page "Finalisation", make sure your details entered are correct, then hit the "Install" button:


If the installation is successful, you will see this page:


Click "Remove installation folder" to be able to browse your Joomla site. Here is the default page of the main Joomla site:


The admin area will look like this:


I hope you find this article useful.

Hanthana Linux 17 "LXDE"


Danishka Navin announced the release of Hanthana Linux 17 "LXDE" edition, a lightweight live CD built from Fedora 17 and featuring the LXDE desktop environment: "Hanthana Linux live CD, the newest member of the Hanthana Linux family comes out today. While our regular DVD release is a complete software repository with the latest 3D-accelerated desktop, the live CD will cater the the needs of low-resource requirements, personalized software selection and simplicity. It comes with all the goodness of Hanthana and Fedora version 17, including Mozilla Firefox, LibreOffice Writer, Calc and Impress, and loads of more lightweight applications. LXDE is a lightweight and customizable desktop environment, which is designed to work with older hardware, although it also works perfectly well with modern 3D-accelerated graphics hardware." Here is the full release announcement which includes a screenshot of the default desktop. Download the installable live CD image from SourceForge: Hanthana-17-i386-livecd.iso (683MB, SHA256).

Saturday, September 29, 2012

[FIX] Ubuntu Keeps Forgetting My Wireless (WiFi) Connection Password / Key - Ubuntu 12.10/12.04


Whenever I restart my computer, Ubuntu asks again for my wireless connection password / key. This also happens even when I set the password to be remembered. If you want to solve this problem under Ubuntu 12.10/12.04, then follow these simple instructions:

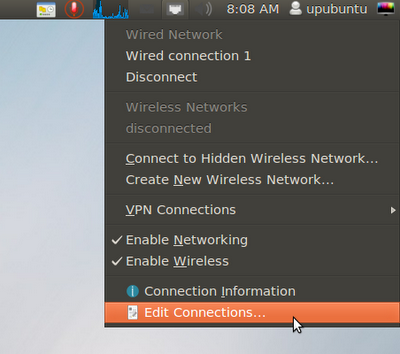
- Click the network icon displayed on the upper panel of Ubuntu and select "Edit Connection":


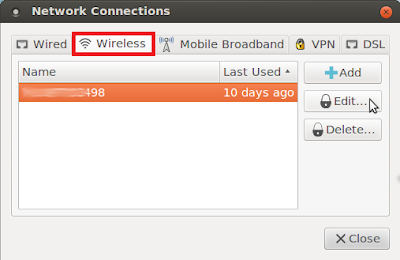
- Open the "Wireless" tab, select your wifi connection and click Edit:


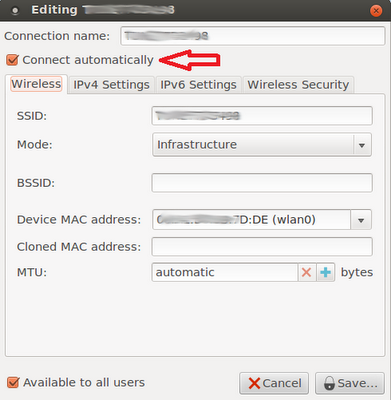
- Make sure now that "Connect automatically" is checked on:


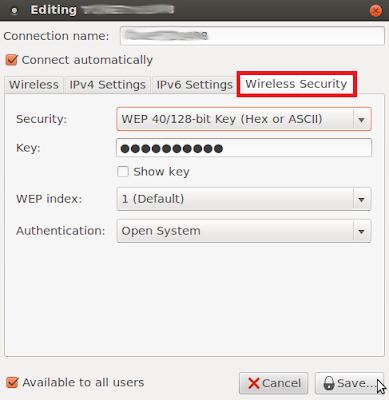
- Next, open the "Wireless Security" tab and enter these details, then click Save:

Security:   WEP 40/128-bit Key (Hex or ASCII)

Key:   Enter your wifi password


From now on, your wifi password will be remembered whenever you reboot your system.

Friday, September 28, 2012

How To Fix A Computer That Won't Restart On Ubuntu 12.10/12.04/Linux Mint 13


If you can't restart your computer under Ubuntu/Linux Mint and the screen turns black with no response after clicking the Restart button, you can follow this tutorial which may solve your reboot issues. This problem is common for owners of laptops or netbooks due to hardware/BIOS problems.

Getting Started

Open the terminal and edit this file under Ubuntu 12.10/12.04/Linux Mint 13:

sudo gedit /etc/default/grub

For Linux Mint, run this command:

sudo pluma /etc/default/grub

Find now this line:

GRUB_CMDLINE_LINUX=""


Replace it with this one:

GRUB_CMDLINE_LINUX="reboot=efi"


Save your file and close, then update Grub with this command:

sudo update-grub

Reboot your system, then try to restart your system to see if it works or not. If this is not working for you, repeat the same steps and try one of these lines instead:

GRUB_CMDLINE_LINUX="reboot=bios"

or

GRUB_CMDLINE_LINUX="reboot=acpi"

or

GRUB_CMDLINE_LINUX="reboot=pci"

If you have more solutions for reboot issues, please mention them in the comment form listed below.

Makagiga 4.4 Released, Installation For Ubuntu/Linux Mint Available


Makagiga is a cross-platform portable application that combines many tasks in a single window like todo listing, reading rss feeds, text editing, and basic image editing & viewing. Makagiga 4.4 is the latest version which brings more features, improvements and changes.


 Here are some of the changes in this latest release taken from the changelog of version 4.4:

* Fixed: Undo support for task color/repeat rule changes
* NEW: Color Chooser Dialog: Bookmarks
* Fixed document tool bar "crash" caused by a recently disabled plugin
* Forms: Auto select all text on field focus
* Font Chooser: Text autocompletion in font name filter box
* Basic Haiku OS support
* Improved Security Manager
* Updated Polish translation
* Various minor updates, bugfixes, and optimizations
* Fixed all compiler warnings
* Updated Eclipse project
* Fixed errors reported by Eclipse IDE
* Replaced @Deprecated API
* Compile with -Werror option
* Added "ui/history" icon

Makagiga 4.4 Installation

To install Makagiga 4.4 in Ubuntu 12.10/12.04/11.10, Linux Mint 13 or older, open the terminal and run the following commands:

cd /tmp

wget -c http://goo.gl/1p6rs -O makagiga_4.4-1_all.deb

sudo dpkg -i makagiga_4.4-1_all.deb

Makagiga requires Java 7 to run. If you have installed Java 7 and you receive this error when launching the application:


You can fix it by running this command from the terminal:

sudo update-alternatives --config java

And set Java 7 as the default Java launcher by entering the correct number:


Makagiga Home Page

Ubuntu 12.10 Beta 2


The second and final beta release of Ubuntu 12.10, code name "Quantal Quetzal", is ready for testing: "The Ubuntu team is pleased to announce the final beta release of Ubuntu 12.10 Desktop, Server, Cloud, and Core products. Some of the new features available since beta 1 are: Quantal beta 2 includes the 3.5.0-15.23 Ubuntu Linux kernel which is based on the 3.5.4 upstream Linux kernel; Unity has been updated to version 6.6 which contains the new default web application in the launcher, a new shopping lens, improvements to the dash and multiple bug fixes; GNOME has been updated to 3.5.92 for most components (some to 3.6.0); accessibility is turned on by default." Read the release announcement and release notes for more information. Download (SHA256): ubuntu-12.10-beta2-desktop-i386.iso (751MB, torrent), ubuntu-12.10-beta2-desktop-amd64.iso (756MB, torrent). Updated CD and DVD images for Kubuntu (download, release notes), Xubuntu (download, announcement), Lubuntu (download), Edubuntu (download) and Ubuntu Studio (download) are also available.

Wednesday, September 26, 2012

How To Install Conky Box On Ubuntu 12.10/12.04/Linux Mint 13


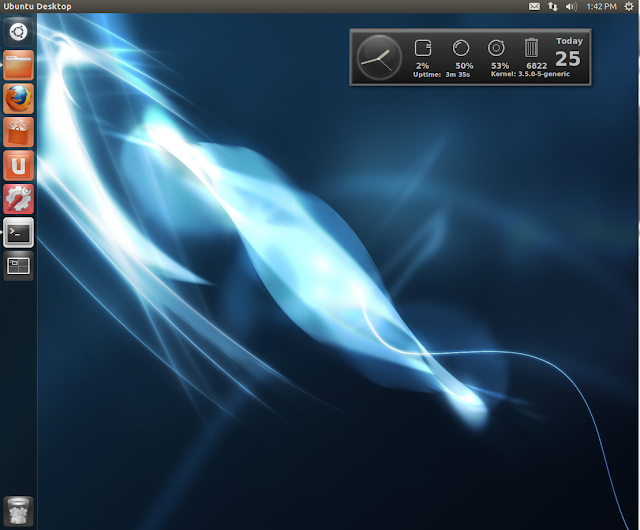
In this tutorial we will see how to install Conky Box under Ubuntu/Linux Mint. This amazing conky script will display on your desktop the clock, date and some system information. You can find its author here.


Conky Box Installation

Install Conky under Ubuntu 12.10/12.04 or Linux Mint 13 with this command:

sudo apt-get install conky-all

Install now Conky Box with these commands:

cd /tmp

wget -c http://goo.gl/MSqme -O conky_box.zip

unzip conky*.zip && cd Conk*

cp Box.png ~/

cp *.lua ~/

mkdir -p ~/Conky_Box

cp conkyrc ~/Conky_Box

To start now Conky Box, run this command:

conky -c ~/Conky_Box/conkyrc

Here is a screenshot of it under Ubuntu:


You can start it automatically by adding it to Startup Applications.

How To Easily Mount ISO Images From Right-Click Menu On Kubuntu 12.04 (KDE 4)


In this tutorial we will see how to use the context menu (right-click menu) to mount iso images without the need to use the terminal or third-party software under Kubuntu 12.04.

Getting Started

Open Konsole and run the following commands:

wget -c http://goo.gl/Ogkf8 -O mount-iso.desktop

sudo mv mount-iso.desktop /usr/share/kde4/services/ServiceMenus/

Right-click now any iso file, then head to the Actions entry to be able to mount it:


Select a folder where you want to mount your image file:


Finally, submit your user password to mount the iso file.

Tuesday, September 25, 2012

Unity Dash Searches Will Be Encrypted in Ubuntu 12.10


A lot of people expressed security concerns about the integration of an Amazon lens into the Home lens in Ubuntu 12.10, but Canonical is making sure that users’ privacy will be respected.

Mark Shuttleworh, founder of Canonical, tried to address some of the problems that were mentioned by users, but the backlash of this new feature in Ubuntu 12.10 has caused quite a stir in the community.

So far, the traffic made through the Unity Dash, towards Amazon and through Canonical's servers, has not been encrypted, but Canonical assured us that this would change with the final version of Ubuntu 12.10.

Jono Bacon, community manager at Ubuntu, posted on his blog a response from John Lenton, the senior engineering manager in the Online Services team at Canonical.
We appreciate some of the community concerns about these searches operating unencrypted and we are currently working to encrypt these dash searches ready for the release of this feature in Ubuntu 12.10. This should resolve most of the concerns shared about unencrypted traffic.

This is certainly good news and the protests will get quiet for a while, at least until Ubuntu 12.10 (Quantal Quetzal) is officially released.

How To Adjust Laptop/Notebook Battery Charge Threshold Under Ubuntu 12.10/12.04/Linux Mint 13


In this tutorial we will see how to adjust charge threshold of a laptop/notebook battery under a system running Ubuntu 12.10/12.04/Linux Mint 13 or older. This will help you set when you want to start and stop battery charging when the laptop is connected to AC power. This is useful for extending battery life of your laptop, but keep in mind that this will reduce runtime.


Note: This tutorial is applicable mainly for Lenovo's ThinkPad laptops and notebooks.
Getting Started

To get information about your laptop battery, run this command:


cat /proc/acpi/battery/BAT0/info
Open the terminal and install the "tp-smapi-dkms" package with this command:

sudo apt-get install tp-smapi-dkms

To check if the module is well loaded, run this command:

lsmod | grep tp_smapi

To set when charge threshold start, run this command:

echo 60 > /sys/devices/platform/smapi/BAT0/start_charge_thresh

Replace 60 with any other battery level percentage of your choice.

To set when charge threshold stops, run this command:

echo 95 > /sys/devices/platform/smapi/BAT0/stop_charge_thresh

In the two commands given above, battery charge threshold will start at 60% and stop at 95%. You can set your own battery threshold percentages depending on the battery size you have and for how long you want to use your laptop.

To run the commands given above automatically at system startup, edit the rc.local file with this command:

sudo gedit /etc/rc.local

For Linux Mint:

sudo pluma /etc/rc.local

And enter the two commands at the end of the file just above "exit 0", then save and close:


Note: This tutorial may not work with all laptops. If you have something to add, please use the comment form listed below.

Install Nvidia Driver 304.51 On Ubuntu 12.10/12.04/Linux Mint 13


Nvidia Driver 304.51 for Linux is now available for download from the Nvidia website which brings more bug fixes, improvements and long support until 2017. The driver adds support for Quadro Sync board for Quadro Kepler GPUs. Here are the full changes in this latest release:


Fixed an X server crash on X.Org xserver 1.13 when it is compiled without support for DRI2.
Fixed a regression that broke color controls on older X servers.
Fixed a bug that sometimes caused the display layout area of the nvidia-settings control panel to be laid out incorrectly.
Fixed a bug that prevented panning from working correctly after a modeswitch on some X servers with support for cursor constraining.
Gamma ramp and colormap adjustments now apply correctly when screen transformations such as rotation and keystone correction are in use.
Fixed RandR per-CRTC gamma persistence across modeswitches and VT-switches.
Fixed a bug that caused the X server to sometimes hang in response to input events.
Fixed a reduction in rendering performance for core X11 rendering on certain GPUs that occurred in the 290.series of releases.
Fixed a bug that prevented PowerMizer from working correctly on some boards with GDDR5 memory, such as some GeForce GT 240 SKUs.
Fixed a bug that caused OpenGL applications to not animate properly when a rotation or a transformation was applied on some older X server versions.
Enabled FXAA with Unified Back Buffers.
Fixed a bug that prevented the "Reset Hardware Defaults" button in the Display Settings page of nvidia-settings from being activated.

Driver Installation

   1. Automatic Installation (PPA Installation)

To install Nvidia Driver 304.51 from PPA, open the terminal and run the following commands for Ubuntu 12.10/12.04/11.10 or Linux Mint 13/12:

sudo apt-add-repository ppa:ubuntu-x-swat/x-updates
sudo apt-get update
sudo apt-get install nvidia-current nvidia-settings

   2. Manual Installation 

If you want to install Nvidia Driver 304.51 manually from *.run files, you can simply follow these instructions for both i386 or amd64 platforms:

- Press CTRL+ALT+F1 and enter your login credentials.

- Kill now the Xserver with this command:

sudo service lightdm stop

- Install now the driver with these commands:

cd /tmp

wget -c  http://dl.dropbox.com/u/47950494/upubuntu.com/nvidia-304-51

chmod +x nvidia-304-51

sudo sh nvidia-304-51

Then follow setup instructions. If the driver is well installed, you can exit Xserver and return to GUI mode with this command:

startx

Finally, reboot your system to apply the new changes. If you find problems installing the Nvidia drivers using these methods, you can try to install it using Recovery Mode as described here.

Install/Upgrade To PHP 5.4.6 Under Ubuntu 12.04/11.10/Linux Mint 13/12


In this tutorial we will see how to install or upgrade to PHP 5.4.6 using an external PPA provided by OndÅ™ej Surý which supports Ubuntu 12.04/11.10 or older and any Ubuntu-based system like Linux Mint 13/12. PHP 5.4.6 fixes many bugs, you can check the full changelog of version 5.4.6 here.  PHP 5.4.7 is also released and still not available in the PPA, but will be added soon.

If you haven't already installed Apache2 and MySQL on your system, then do with the following commands:

sudo apt-get install -y mysql-server mysql-client apache2

Installing PHP 5.4.6

Via the terminal, issue these commands:

sudo add-apt-repository -y ppa:ondrej/php5
sudo apt-get update
sudo apt-get install -y php5 libapache2-mod-php5

Restart now Apache2 with this command:

sudo /etc/init.d/apache2 restart

To check if the installation of PHP 5.4.6 is successful, run this command:

php5 -v

$  php5 -v
PHP 5.4.6-2~precise+1 (cli) (built: Aug 30 2012 14:38:34)
Copyright (c) 1997-2012 The PHP Group
Zend Engine v2.4.0, Copyright (c) 1998-2012 Zend Technologie

Or create a PHP file with this command:

echo "" | sudo tee /var/www/test.php

Restart Apache2:

sudo /etc/init.d/apache2 restart

Open now this URL (replace localhost with your own server IP address if needed):

http://localhost/test.php


Monday, September 24, 2012

How to Record Screencasts as Animated GIFs under Ubuntu 12.10/12.04/11.10/Linux Mint 13


A screencast is the recording of computer screen (aka screen capture) with the help of screen recording software. If you want to convert these screencasts into animated GIFs to use them on your blog or website, then this tutorial will explain this using two methods under Ubuntu/Linux Mint.

Method 1

The first method consists of using Byzanz which allows to record screencasts as GIFs. To install it under Ubuntu 12.10/12.04/11.10 or Linux Mint 13/12, open the terminal and run these commands:

sudo add-apt-repository -y ppa:fossfreedom/byzanz
sudo apt-get update
sudo apt-get install -y byzanz

You can now use this comman to record GIF screencasts (replace details with your own):

byzanz-record --duration=15 --x=400 --y=400 --width=800 --height=600 output.gif

For more help about the use of Byzanz, run this command:

byzanz-record --help


Note: The GIF file will be saved in the current terminal location.
Method 2

The second method is a little bit complicated because we will use a screen capturing tool to record a screencast, convert this video to images (JPG), then converting these images to an animated GIF. Let's firstly install needed packages with this command:

sudo apt-get install imagemagick gtk-recordmydesktop mplayer

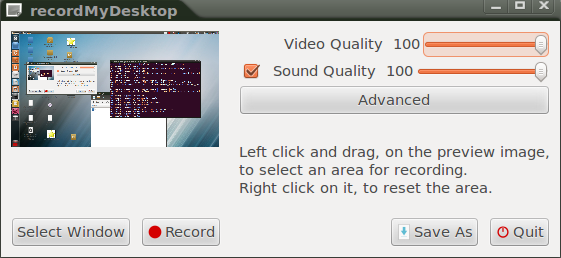
Start now the recordMyDesktop application and record a screencast, then save it in any folder of your choice (.ogv format).


Let's now save this video in JPG screenshots with this command:

mplayer -ao null video.ogv -vo jpeg:outdir=mypics

video.ogv -> Replace it with your own video file name.
mypics -> This is the name of the folder that will contain the extracted JPEG files. Rename it to whatever you want.

Using the terminal, cd to the folder containing JPEG screenshots and run this command:

convert * file.gif

If you have extracted the JPEG files in a folder containing various file formats, then run this command instead:

convert *.jpg file.gif

Rename file.gif with any name of your choice. The conversion may take time depending on the total size of JPEG files.

To optimize this GIF file, you can use this command:

convert file.gif -fuzz 15% -layers Optimize file-optimized.gif

Sunday, September 23, 2012

How To Disable Recovery Mode Under Ubuntu 12.10/12.04/Linux Mint 13


RecoveryMode is very useful for users who have boot issues because it will help them repair their systems using CLI mode with root privileges. The problem here is that unauthorized users who may have access into Recovery Mode would have root permissions on your system files without the need to enter the root password. If you are a bit concerned about this security issue, you can disable Recovery Mode using the instructions given below.


WARNING: Disable "Recovery Mode" at your own risk! Any incorrect modification may render your system unusable or unbootable.
The tutorial will help you disable Recovery Mode under Ubuntu 12.10/12.04/11.10, Linux Mint 13/12 or older. Here is how the Grub boot menu will look before and after modifications:


But firstly, let's backup the file we are going to edit with this command:

sudo cp /boot/grub/grub.cfg /boot/grub/grub.cfg.back

Edit now grub.cfg with this command:

sudo gedit /boot/grub/grub.cfg

For Linux Mint, edit it with this command:

sudo pluma /boot/grub/grub.cfg

In this file, press CTRL+F and search for "recovery" without quotes. The lines related to recovery mode should be commented all in order to disable RecoveryMode. They will be represented as follows:

menuentry 'Ubuntu, with Linux x.x.x- (...) (recovery mode)' (...) {
(...)
(...)
(...)
}

After being commented, they would look like this:

# menuentry 'Ubuntu, with Linux x.x.x- (...) (recovery mode)' (...) {
# (...)
# (...)
# (...)
# }

Here is a real example:

Click To Enlarge

After commenting all lines related to Recovery Mode, save your file and reboot your system. Hold down the SHIFT key to bring up the GRUB boot menu. If your modifications are correct, Recovery Mode line will not appear in the boot menu:


To enable Recovery Mode, run this command from the terminal:

sudo cp /boot/grub/grub.cfg.back /boot/grub/grub.cfg

Saturday, September 22, 2012

SMPlayer 0.8.1 Released, Installation Via PPA Available For Ubuntu 12.10/12.04/Linux Mint 13


SMPlayer is a media player (front-end for MPlayer) capable of playing almost any audio/video formats such as avi, mp4, mp3, mpeg, etc. The player has many interesting features like the ability to remember settings done to played media files. When closing, for example, a video and re-open it, it will be resumed from the point you ended your viewing of the video with the same settings set (volume, subtitles, etc.).


You can review all features for SMPlayer here. The latest version of SMPlayer is 0.8.1 which brings a fix for Youtube playback problems. To install SMPlayer 0.8.1 on Ubuntu 12.10/12.04/Linux Mint 13 or older, open the terminal and run the following commands:

sudo add-apt-repository ppa:rvm/smplayer
sudo apt-get update
sudo apt-get install smplayer smplayer-themes smtube

Red Hat Enterprise Linux 5.9 Beta


The legacy release Red Hat Enterprise Linux (RHEL), version 5, is getting one more "Production Phase 1" update on its 10-year life cycle road. A beta build of version 5.9 is now available for download and testing. From the release announcement: "Red Hat is pleased to announce the availability of the beta of the next minor release of Red Hat Enterprise Linux 5, Red Hat Enterprise Linux 5.9. Included in this minor release are a broad set of updates to the existing features. The beta release also provides new functionality in the areas of virtualization and networking, and new support for standards, certifications and security, as well as new features that support certificate-based Red Hat Subscription Management. Also included are additions to capabilities for developers and support for some of the latest platforms from our hardware partners. With new drivers for Microsoft Hyper-V that have recently been accepted by the upstream Linux community, customers can now run Red Hat Enterprise Linux 5.9 as a virtual guest on Hyper-V with improved performance." Existing RHEL customers can download this beta release from Red Hat's Software & Download Center.

Friday, September 21, 2012

Manjaro Linux 0.8.1


Roland Singer has announced the release of Manjaro Linux 0.8.1, an Arch-based Linux distribution featuring the latest Xfce desktop: "Exactly one month after we released our first beta of Manjaro Linux, here is our first point-release in our 0.8 series. Most people criticized that Manjaro wasted to much RAM. We replaced LightDM with LXDM, specially patched to have a better theme support. Of course we needed a nice Manjaro theme for LXDM. The only problem is that there are no LXDM themes available. So I sat down last night with a cup of coffee and started coding. To have a nice login interface I wanted to add a transparent black background to the login area. This required some patching in the LXDM greeter. I am really happy with the result and I hope you like the new LXDM Manjaro theme." Read the release announcement for a list of enhancements in this version. Download links: manjaro-xfce-0.8.1-i686.iso (1,461MB, SHA256), manjaro-xfce-0.8.1-x86_64.iso (1,663MB, SHA256).

Thursday, September 20, 2012

[Fix] WinFF Not Working On Ubuntu 12.04 (Precise Pangolin)


If WinFF crashes under Ubuntu 12.04 Precise Pangolin, you can try the solutions given below which may solve your problem. This problem is common after upgrading to Ubuntu 12.04.

Make a backup of the original presets.xml file with this command:

cp ~/.winff/presets.xml presets.xml.back

Let's now replace the old presets.xml file with a new one downloaded from the publisher's website as follows:

cd /tmp

wget -c http://goo.gl/l9cTl -O presets-libavcodec53-v4.xml.gz

 gzip -d presets-libavcodec53-v4.xml.gz

mv presets-libavcodec53-v4.xml ~/.winff/

mv ~/.winff/presets-libavcodec53-v4.xml presets.xml

WinFF should work fine now. If this hasn't solved your problem, you can simply reinstall WinFF with these commands:

rm -rf ~/.winff/

sudo apt-get install --reinstall winff

Slackware Linux 14.0 RC5


Slackware Linux 14.0 is getting very close to being released, but Patrick Volkerding has decided to play it safe and offer one more release candidate for testing: "Here we go one more time with Slackware 14.0 release candidate 5. Really, this time it is not a drill! Everything is in place and ready to release at this point, and unless there's some kind of showstopper found, the release can be expected soon. After careful consideration and a considerable amount of internal testing I did relent to give the kernel one more bump to 3.2.29, so of course 3.2.30 was released a couple of hours ago. But that's not a showstopper, and it seems to be time to get off the never-ending kernel upgrade treadmill until the next cycle begins. Speaking of kernels, I added sample .configs for all the 3.x kernel branches in /testing." See the distribution's changelog for a full list of recent changes. If you'd like to give it one last round of testing then download Eric Hameleers' unofficial DVD images from here: slackware-current-install-dvd.iso (2,320MB, MD5), slackware64-current-install-dvd.iso (2,275MB, MD5).

GeeXboX 3.0


GeeXboX 3.0, a free and open-source Linux media centre distribution for embedded devices and desktop computers, has been released: "A shiny new GeeXboX release has arrived. GeeXboX 3.0 is a major upgrade that integrates XBMC 11 'Eden' and adds the long-requested PVR functionality. This means that you can finally use GeeXboX to watch and record live TV. In addition to our usual x86 ISO images, this release is also available for several embedded platforms, with working Full HD video and graphics acceleration for most of them. New features: XBMC Media Center 11 'Eden' frontend; PVR support for DVB Digital TV to watch and record live TV; improved remote control support; support for Full HD videos on PandaBoard and Cubox; improved hard disk installation; installation support for (U)EFI systems; installation support for SSDs." Read the complete release announcement for information on supported platforms and other details. Download: geexbox-3.0-i386.iso (136MB), geexbox-3.0-x86_64.iso (138MB).

Wednesday, September 19, 2012

Google Earth 6.2.2.6613 Review


Building a software that can catalog an entire planet is not a feat for everyone, and if there is someone out there who is up for the task, then Google is surely the only company capable to do it.

Sure, many have tried to encompass the entire Earth in a single application in the past, but the sheer size of the software would have made this task almost impossible. More importantly, whatever software someone would use, such as an Encyclopedia, it would never cover places that had no special significance.


Many of us are now used with Google Earth, but we must keep in mind that back in 2005, when it was first launched, it made a big impact. Its arrival was made possible by the advent of high-speed Internet which permitted the fast streaming of images.

We have to give credit where it's due. Google did not built this from scratch, but bought a company in 2004, called Keyhole Inc., which at that time was developing a software called EarthViewer 3D. The company was funded by non-others than the CIA.

How they managed to buy it with the approval of the government is beyond me; maybe CIA needed to expand the software and Google had enough money and man power to do this.

Installation

Depending on your operating system, you might have the Google Earth package in your repository. If not, Google provides packages for everyone, including Debian-based operating systems and Red Hat based ones. Both 32-bit and 64-bit architectures are supported.

We've installed it in Ubuntu 12.04 LTS (Precise Pangolin) by downloading the Debian package from the official website. You will need a lot of dependencies so just run the following commands in a terminal, one by one, and everything should be just fine:

sudo dpkg -i google-earth-stable_current_i386.deb
sudo apt-get -f install


You should now have Google Earth installed and available from Unity or from your Application menu.

Usage

The number of features crammed in this software is amazing. It would take dozens of pages to go through all of them and in the end no one would understand much of it.

Let's start with the basics. Google Earth is a software that renders the surface of the planet (and more) with the help of satellite imagery, from a myriad of sources.

The software can be used as a simple map, searching for locations, plotting routes, and even zooming in at street level. I actually used it a couple of times to find remote interesting ski resorts and even found accommodation with it. It's very versatile and it estimates arrival time with great accuracy.

On top of this fundamental function, there are a lot of implemented layers. You can activate all of them or one at a time. Some are quite basic such as country borders, roads, gallery, photos (including the Panoramio service and 360Cities), 3D buildings (an amazing feature that is beautifully integrated with StreetView), Global Awareness, and many more.

Besides the obvious use, there are a lot of functions that are almost never used, and the average user has no idea that they exist. First off, there's the flight simulator, where users define a starting point and start flying over the landscape in a simple, but relatively correct, flight simulator. A joystick is required for precise flying, of course.

Another important function is the Sky Mode, where users can switch from viewing the Earth in the exactly opposite position, and start looking at the stars. The star charts are amazing and actual images are used to render the sky, including nebulae, galaxies and even star systems.

The planet Mars and the Moon are also available in great detail. All the high-res images NASA has taken over the years have been implemented in Google Earth so everyone can enjoy the landscape of other heavenly bodies in the way they truly look.

The Good

The obvious teaching capabilities of the software cannot be expressed in words. There are so many things that can be done with Google Earth, that it's almost impossible not to find use for it.

The streaming of images has improved greatly over the years and the application has managed to keep low hardware requirements.

Google has dedicated a lot of time and effort to this project and it shows. 3D buildings are added all the time, new sources for images are implemented on a regular basis, and they even managed to help government authorities to control a crisis like the one in Haiti by refreshing their images just a few days after the calamity.

The Bad

I have only one reproach and I'm pretty sure that it's a problem only present on the Linux platform, most probably on Ubuntu. I can't say that other distributions have this particular problem as I did not test it. Google Earth uses proprietary Microsoft fonts, but even with the appropriate package installed, the fonts are hard to read and they look terrible.

Conclusion

Google Earth is one the first apps I install on a fresh system, even if I don't have an immediate use for it.

The development of Google Earth has slowed down in the last couple of years and I sincerely hope that Google will continue to pour money into it for further development. It's an amazing project that should continue to exist for many years to come.


15 Best Gnome Shell Themes For Ubuntu 12.04 Precise Pangolin


In this page we will introduce 15 amazing Gnome Shell themes that can be installed under a system running Ubuntu 12.04 (Precise Pangolin). If you haven't enabled the user theme extension, you can find here a good tutorial explaining this.

You should know that most of these themes work only with Gnome Shell (3.4, 3.6 etc.), so don't confuse them with GTK2/3 themes because they are totally different.

To enable these themes under Ubuntu, you need to install GNOME Tweak Tool with this command:

sudo apt-get install -y gnome-tweak-tool

Next, add the PPA to install themes from:

sudo add-apt-repository ppa:upubuntu-com/shell

sudo apt-get update

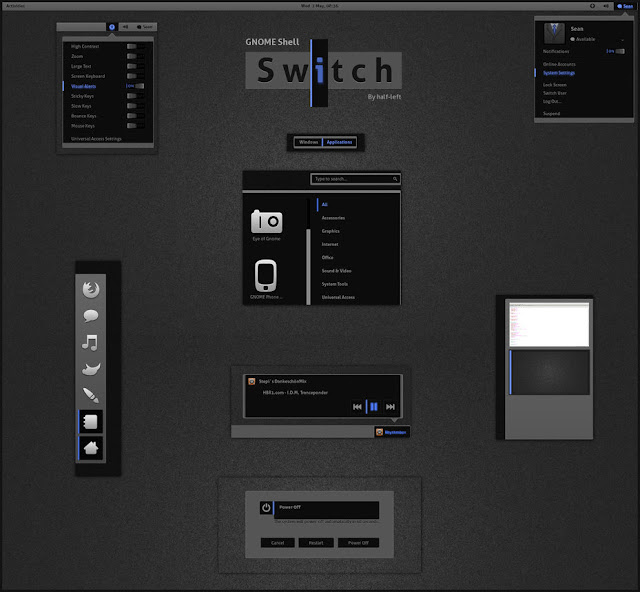
1. Switch (Gnome Shell 3.4)


sudo apt-get install switch-theme

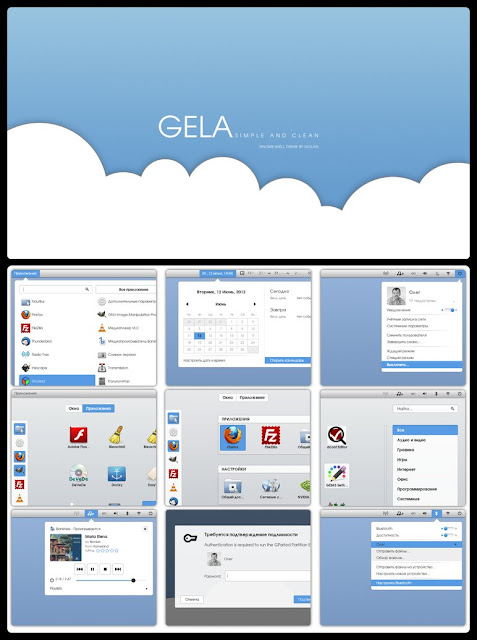
2. Gela (Gnome Shell 3.4)


sudo apt-get install gela-theme

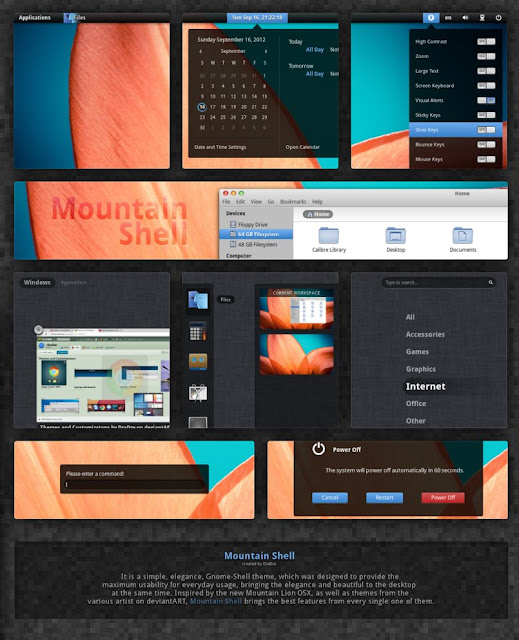
3. Mountain Shell (3.4)


sudo apt-get install mountain-shell

4. LM-Club (Gnome Shell 3.4 & GTK3)


sudo apt-get install lm-club-theme

5. Elegance Colors (Gnome Shell 3.6)


sudo add-apt-repository ppa:satyajit-happy/themes
sudo apt-get update
sudo apt-get install gnome-shell-theme-elegance-colors

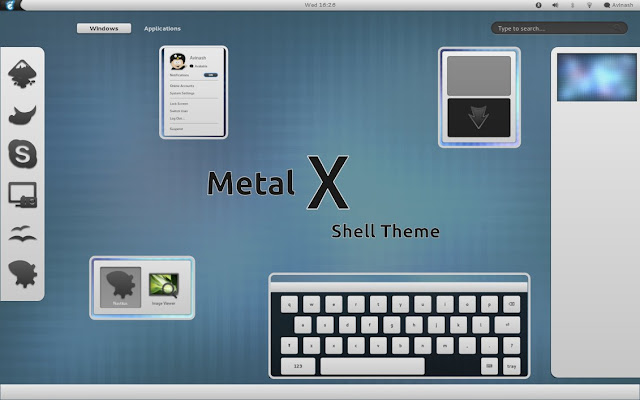
6. Metal X (Gnome 3.4)


sudo apt-get install gs-metalx

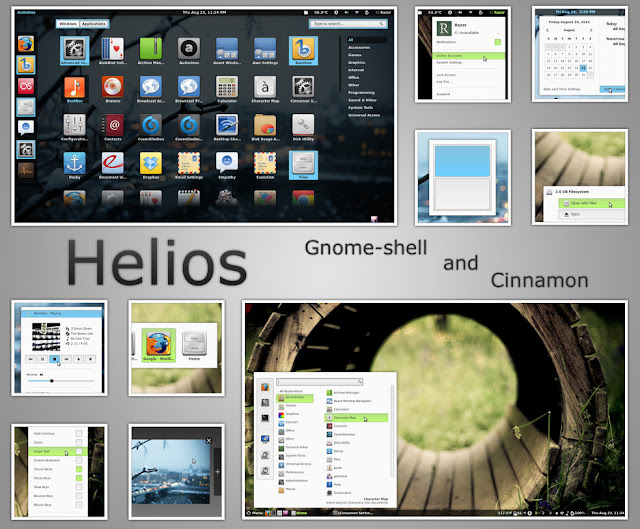
7. Helios (Gnome shell 3.4.2  and Cinnamon 1.4)


sudo apt-get install gs-helios

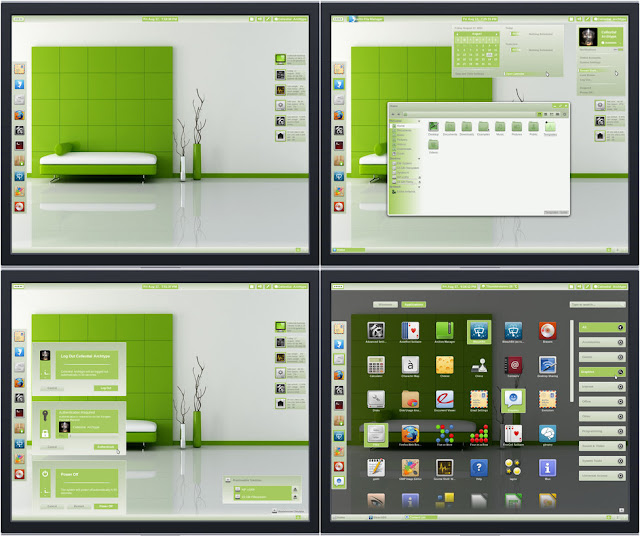
8. Energreen (Gnome 3.4 & GTK3)


sudo apt-get install energreen-theme

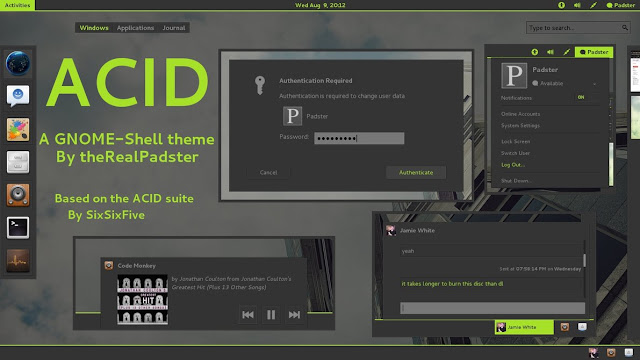
9. ACID ( GNOME-Shell 3.4)


sudo apt-get install gs-acid

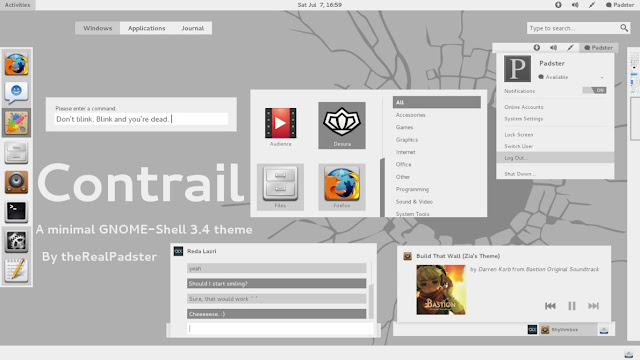
10. Contrail


sudo apt-get install gs-contrail

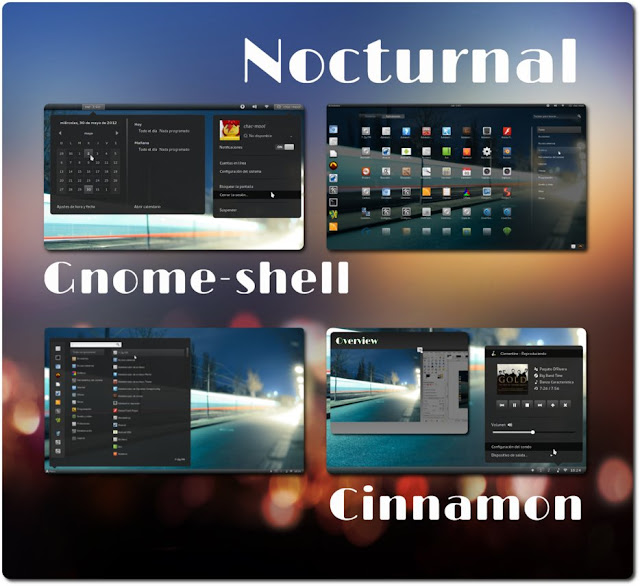
11. Nocturnal (Gnome 3.4 & Cinnamon 1.4)


sudo apt-get install gs-nocturnal

12. GrayRevenge


sudo apt-get install gs-grayrevenge

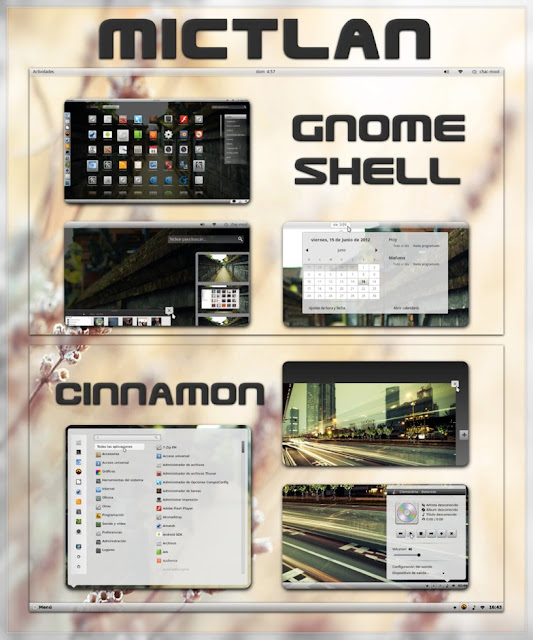
13. Mictlan (Gnome 3.4 & Cinnamon 1.4)


sudo apt-get install gs-mictlan

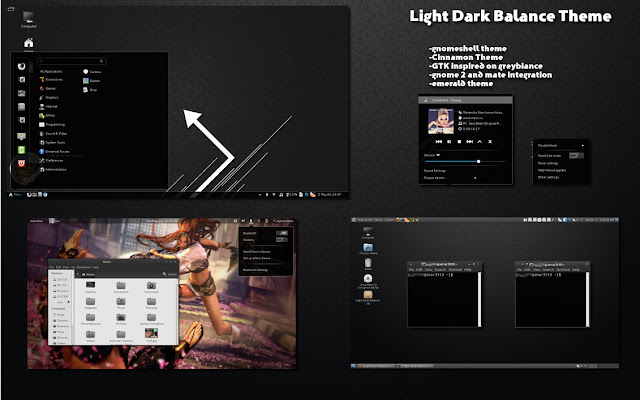
14. Light Dark Balance (gnome shell - Cinnamon - GTK2/3)


sudo apt-get install light-dark-balance-theme

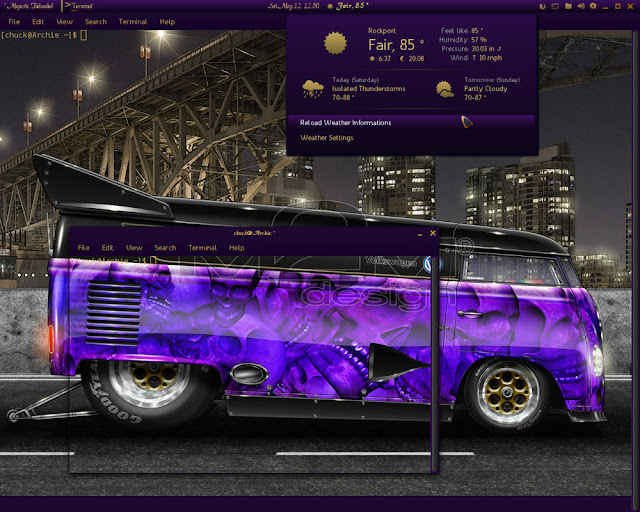
15. Majestic Reloaded (Gnome Shell - Cinnamon - GTK2/3)


sudo apt-get install majestic-reloaded-theme