Thursday, July 26, 2012

Use "free" to monitor memory usage continuously


The "free" command is used to display the memory usage info of your computer. But with the normal "free" command, you get the info only once. To use "free" to display the memory usage of your computer continuously, you can use the "-s" option with the "free" command. For example, to display the info every 2 seconds, you can use the following command:

free -s 2

With this command, the memory usage will be printed continuously in the terminal after every 2 seconds.


Another way you can try is to combine the "watch" command with "free". For example, to get the memory usage info every 2 seconds using "watch" and "free", the command you can use is:
watch -n 2 free

And you will have an output like this:


LibreOffice Conference 2012: 17th - 19th October


We are proud to announce today, July 25th, that The Document Foundation presents the second annual LibreOffice Conference event, which will be held in Berlin, Germany.

The LibreOffice Conference 2012 event will take place between 17th and 19th October, 2012, and it will gather people interested in the development of the best free, cross-platform office suite, LibreOffice.

The event is also a great opportunity for all LibreOffice developers, community members, and hackers to meet and share their knowledge.

For more information about the LibreOffice Conference 2012 event you can check out the official wiki page provided by The Document Foundation.

Scheduled to be launched on August 1st, LibreOffice 3.6 is a major release of the office suite, bringing a slightly revamped and clean interface, as well as numerous new features for all its components.

Wednesday, July 25, 2012

Videolan Releases VLC Beta Version For Android Devices


Earlier this month, VideoLAN affirmed the news on twitter that VLC beta version for android devices has been launched. Now, you can play almost any audio or video files on your android devices because VLC beta version is enriched with following intriguing features;


  • Plays all files, in all formats, like the classic VLC
  • Audio and video media library, with full search
  • Support for network streams, including HLS
  • Subtitles support, embedded and external, including ASS and DVD subtitle
  • Multi audio or subtitles tracks selection
  • Multi-core decoding, for Cortex-A7 A9 and A15 chips
  • Experimental hardware decoding
  • Gestures, headphones control
However, this beta version supports android devices from 2.1 version (platform-7) that means all the devices based upon the ARMv6, ARMv7 and the ARMv7+NEON Engine. In other words, the devices it supports encompass of Galaxy Nexus (OMAP 4460), HTC One X (Tegra 3), Samsung Galaxy S3 (Exynos 4 Quad), Motorola Defy (OMAP 3610), HTC Desire (QSD8250 Snapdragon) and Nexus one (QSD8250 Snapdragon). Moreover, the beta version is available to download on Google Playstore for the android users. So if you are the one then hurry up and get your hands on one of the finest media players, now, available on one of the finest mobile devices. Bare in mind, this is a beta version which meant it may prone to discrepancies as it’s not the finalized version.


To get the beta version on your android device, follow the link;
https://play.google.com/store/search?q=VLC+Mobile+Team

Free Upgrade To MOUNTAIN LION OS X For Post 10 June Buyers Of MAC


A definite felicitation to those who purchased a MAC after 10 June 2012 as they have qualified to upgrade their OS to new Mountain Lion OS X which is dated  to release later this month. Ain’t it a blazing news, well it’s not a stroke of serendipity rather a promotional plan by Apple. Mac Rumors further elaborated about the upgrade that qualified candidates would be able to directly download new Mountain Lion OS X from the app store. However, they have to claim the opportunity within 30 days of Mountain Lion release.


To claim the free upgrade to Mountain Lion, qualified candidates have to adhere by the following steps;
Launch the Up-to-Date Program page (An online form asks to enter contact information, date and location of purchase, and the serial number of the Mac)


  • Having done with this, you will receive a redemption code via e-mail
  • Go to Mac app store
  • Submit the code at the Mac App Store to download the update.
Lastly, as an add on, the new version of OS X is expected to launch this week probably by tomorrow. However, those who do not qualify to avail the spunky opportunity can purchase the Mountain Lion for meager cost of $19.9 from the app store.
For more details, follow the link: http://www.apple.com/osx/uptodate/

Conky 2: A Nice Conky Desklet For Your Desktop - Ubuntu/Linux Mint


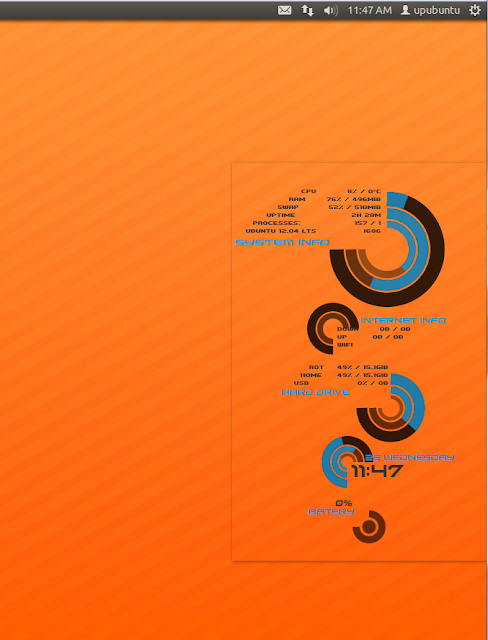
In this tutorial, we will see another conky desklet that has a cool design. Conky2 will display on your desktop system info such as CPU usage & temperature, network activities, hard drive I/O, date, laptop battery level, etc.


To make the installation of this conky script easier, I have packaged it in a Debian package and uploaded it to our custom PPA. You can find here the original creator of this desklet.

Conky 2 Installation

To install conky2 on Ubuntu 12.10/12.04/11.10 or Linux Mint 13 or older, open the terminal and issue these commands:

sudo add-apt-repository ppa:upubuntu-com/conky
sudo apt-get update
sudo apt-get install conky2-desklet

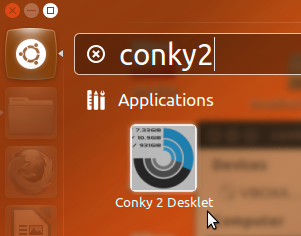
You can start it now from the Unity Dash:


For Linux Mint 13, start it from the start menu, or run this command from the terminal:

conky2

To stop it, run this command:

killall conky

Enjoy!

Piggydb: An Easy Web Solution For Building Knowledge Repositories Under Ubuntu/Linux Mint


Piggydb is a web-based application (run in a web browser) that allows users to build knowledge repositories. Piggydb allows the user to input into the repository knowledge fragments that can be easily organized, categorized, and searched so that data can be easily and quickly retrieved. It's similar in concept to blogging. You can find more information about Piggydb in this page.


In this tutorial, we will help you install Piggydb on Ubuntu (12.10/12.04/11.10) and Linux Mint 13 or older. The tutorial is also applicable on other debian-based systems.

Piggydb Installation

We will install Piggydb in the home directory. If you want to select a different location, you can set your own path in the commands given below. Open now the terminal and download and install Piggydb 5.1 (stable) with these commands:

sudo apt-get install unzip


cd /tmp && wget -O piggydb-all-in-one-5.1.zip http://goo.gl/zjjTh


unzip -q piggydb-all-in-one-5.1.zip -d ~/


chmod +x ~/piggydb/run.sh

You can now start Piggydb with this command:

cd ~/piggydb/ && sh run.sh

Open now your web browser at this address:

 http://localhost:8080

The default login details are as follows:

username: owner
password: owner


You need to change them once you are logged on under owner > Change Password. To stop Piggydb, press Ctrl+C in the terminal.